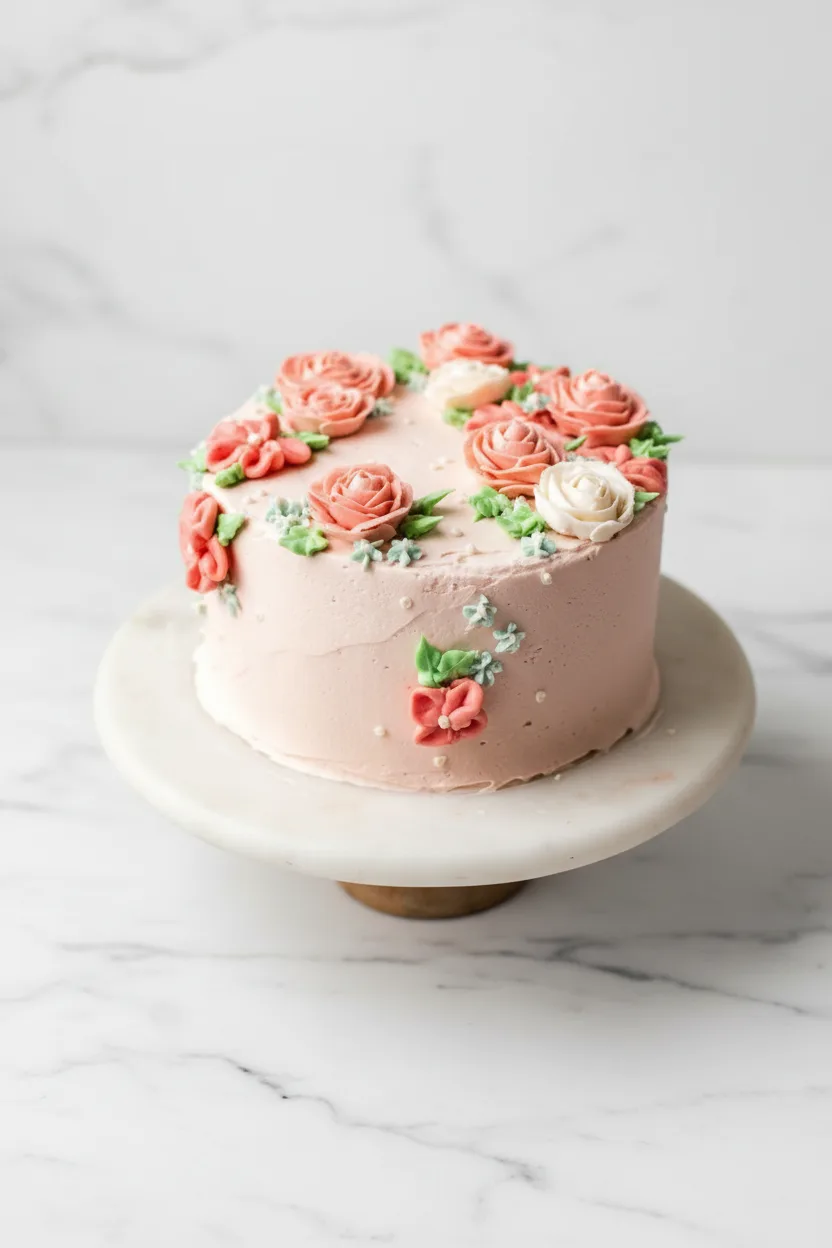
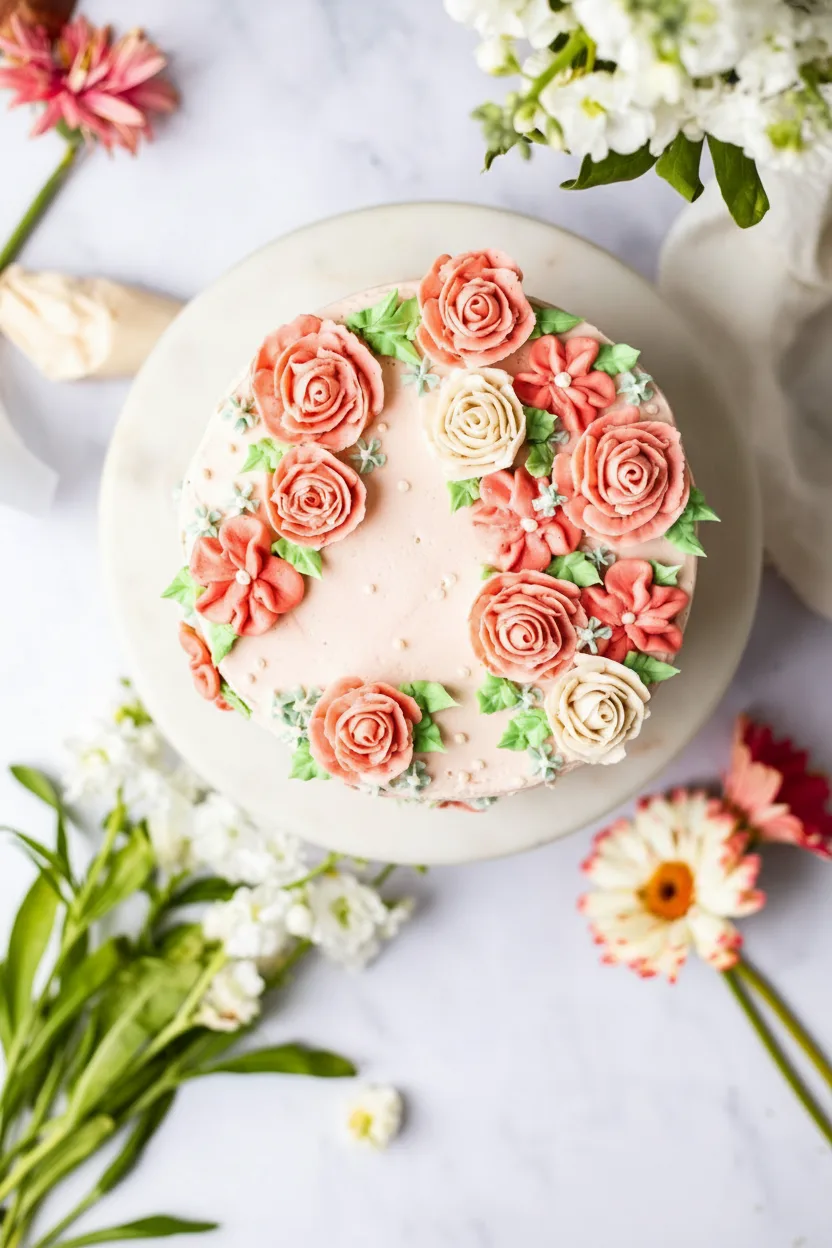
Imagine cutting into a beautiful sheet cake covered in delicate, colorful buttercream flowers. This Pink Floral Buttercream Sheet Cake is a stunning dessert that looks like it came from a professional bakery. However, you can make it right in your own kitchen. With a moist vanilla base and a gorgeous array of piped flowers, this cake is perfect for birthdays, baby showers, or any spring celebration.
Furthermore, the design is wonderfully customizable. You can choose any color palette you like. This guide will walk you through each step, from baking the perfect sheet cake to piping professional-looking flowers. Let us create a show-stopping dessert together.
Why You’ll Love This Pink Floral Buttercream Sheet Cake
This cake combines simplicity with spectacular visual appeal. First, you start with a reliable vanilla cake recipe. This provides a delicious and sturdy foundation. Next, you get to unleash your creativity with the buttercream flowers. The process is meditative and fun. Consequently, you end up with a cake that tastes as good as it looks.
The buttercream is sweet and smooth, perfectly complementing the soft cake. Another great reason to try this recipe is its versatility. You can match the flower colors to any party theme. Finally, this cake serves a crowd, making it ideal for large gatherings. Everyone will be impressed by your decorating skills.
Recipe
Print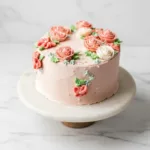
Pink Floral Buttercream Sheet Cake
- Total Time: 2 hr 45 min
- Yield: 16 servings 1x
Description
A stunning vanilla sheet cake decorated with beautiful piped buttercream flowers, perfect for celebrations.
Ingredients
- 1 batch of your favorite vanilla sheet cake recipe
- 2 1/2 batches of vegan buttercream frosting
- Plant-based gel food coloring in assorted colors
- Parchment paper squares for flower nails
Instructions
- Bake your selected sheet cake according to its recipe instructions and let it cool completely.
- Prepare one batch of buttercream frosting for the crumb coat and outer frosting layer.
- Apply a thin crumb coat of frosting to the fully cooled cake and chill in the fridge for 20 minutes.
- Apply a final, smooth layer of plain buttercream over the chilled crumb coat and return the cake to the fridge.
- Prepare a second batch of buttercream and divide it into bowls, tinting each with plant-based food coloring.
- Using a petal piping tip (like Wilton 104), pipe roses onto parchment squares on flower nails and freeze immediately.
- Remove the cake from the fridge and attach frozen flowers using dots of reserved frosting.
- Pipe green buttercream leaves around the flowers using a leaf tip to finish the design.
Notes
- Ensure the cake is completely cool before frosting to prevent melting.
- Gel food coloring is preferred over liquid for vibrant color without thinning the frosting.
- Work with frozen flowers for easier placement on the cake.
- Practice piping flowers on parchment paper before decorating the cake.
- Prep Time: PT-983867H21M24S
- Category: Main Course
- Method: Baked
- Cuisine: American
Ingredients and Substitutions
This recipe uses a two-part system: the cake and the decorations. Here is what you need and how you can make swaps.
Base Components
- Your Favorite Cake Recipe: A simple vanilla sheet cake works best. You can use a classic recipe or a vegan vanilla cake for a dairy-free option. The key is a flat, even surface for decorating.
- Vegan Buttercream Frosting: You will need about two and a half batches. This frosting pipes beautifully and holds its shape. American buttercream also works well if you prefer a sweeter, richer frosting.
Decorations and Coloring
- Plant-Based Food Coloring: Gel colors are highly recommended. They provide vibrant hues without thinning the frosting. Look for natural plant-derived powders or gels for the best results.
- Parchment Paper Squares: Essential for creating the frozen buttercream flowers.
How to Make Pink Floral Buttercream Sheet Cake
Follow these steps for a flawless floral cake. Patience during the cooling phases is the secret to success.
Step 1: Bake and Cool the Cake
Start by baking your chosen sheet cake according to its recipe instructions. Use a standard 9×13 inch pan for the best proportions. Once baked, let the cake cool completely in the pan on a wire rack. This will take at least one hour. A fully cooled cake is crucial because warm cake will melt the frosting and ruin your decorations.
Step 2: Prepare the Base Frosting
While the cake cools, prepare one full batch of your buttercream frosting. This first batch is for the crumb coat and the outer layer of frosting. Keep it plain and untinted for now. Set aside a small amount of this white frosting for later use as adhesive and for adding final details like leaves.
Step 3: Apply the Crumb Coat
Once the cake is cool, turn it out onto a serving plate or cake board. Spread a thin layer of the plain buttercream over the entire surface of the cake. This initial “crumb coat” traps any loose crumbs and creates a smooth base for the final frosting layer. After applying the crumb coat, place the cake in the refrigerator to chill for about 20 minutes.
Step 4: Frost the Cake
Remove the cake from the fridge. If you desire a thick outer coating, you can prepare an additional half batch of plain frosting now. Apply a generous, even layer of plain buttercream over the chilled crumb coat. Use an offset spatula to create a smooth finish. This sets the stage for your floral arrangement. Return the frosted cake to the refrigerator.
Step 5: Create the Buttercream Flowers
This is the most artistic part. Prepare a second full batch of buttercream. Divide it into several small bowls. Tint each portion with your chosen plant-based food colorings. For pink floral designs, create shades of pink, from pale blush to deep rose. Use about half to three-quarters of a cup of frosting per flower color.
Fit a piping bag with a petal decorating tip, such as a Wilton 104 or 127. Place a small dab of frosting on a flower nail and top it with a square of parchment paper. Hold the bag with the wider end of the tip facing down. Pipe a small, tight circle to form the center of a rose. Then, angle the tip and pipe overlapping petals around the center.
Continue until the rose is your desired size. Slide the parchment paper with the flower onto a baking sheet and immediately place it in the freezer. Repeat to make all your flowers, freezing them as you go.
Step 6: Assemble the Floral Design
Take the cake out of the fridge. Plan your design. To attach each frozen flower, place a small dot of the reserved white frosting on the back. Gently press the flower onto the cake. The frozen buttercream will stick quickly without losing its shape. Arrange all flowers on the cake. Finally, fit a piping bag with a leaf tip.
Use green-tinted frosting to pipe leaves between and around the flowers. This adds a beautiful, finished look. For a lighter side dish to balance the sweet cake, try a refreshing Greek salad with fresh feta.
Pro Tips for Success
A few simple tricks will elevate your cake from good to great. First, always ensure your buttercream is the right consistency. It should be stiff enough to hold a peak but smooth enough to pipe easily. If it is too soft, chill it briefly. If it is too stiff, mix in a teaspoon of non-dairy milk.
Second, work with frozen flowers. They are much easier to handle and place on the cake without smudging. Third, do not rush the cake cooling process. A warm cake is the number one cause of frosting meltdown. Finally, practice your flower piping on a piece of parchment paper before decorating the cake. This builds confidence and skill.
Flavor Variations
The vanilla cake and frosting base is a perfect canvas for other flavors. For a citrus twist, add lemon or orange zest to the cake batter and frosting. You could also use almond extract for a classic, nutty flavor. Consider matching your flower colors to the flavor inside. For example, yellow flowers could pair with a lemon cake.
Pink flowers could hint at a strawberry or raspberry flavored cake. Another great idea is to add a layer of fruit jam between the cake and the frosting. This adds a burst of flavor and moisture. A Mediterranean orzo salad offers a savory contrast if you are serving this cake as part of a larger meal.
Serving Suggestions
This cake is a celebration centerpiece. Serve it on a beautiful cake stand to showcase the floral design. Use a sharp, hot knife to cut clean slices. Wipe the blade between cuts for neat pieces. Since the cake is rich and sweet, it pairs wonderfully with fresh berries or a scoop of non-dairy vanilla ice cream.
For a brunch or afternoon tea, serve smaller slices alongside coffee or tea. The cake also makes a fantastic gift. You can present it on a disposable tray for easy transport. For a complete menu, pair this sweet dessert with lighter fare like a cool cucumber ranch salad.
Storage and Freezing Instructions
Store any leftover cake covered in the refrigerator for up to five days. The buttercream will keep the cake moist. For longer storage, you can freeze the undecorated cake layers. Wrap them tightly in plastic wrap and then foil.
They will keep for up to three months. Thaw overnight in the refrigerator before frosting and decorating. You can also freeze the finished, decorated cake. Place it uncovered in the freezer until the frosting is solid. Then wrap the whole cake tightly in several layers of plastic wrap. It will keep for up to one month. Thaw it in the refrigerator for several hours before serving.
Nutrition Facts per Serving
| Calories | Fat | Carbs | Protein | Fiber | Sugar | Sodium |
|---|---|---|---|---|---|---|
| 380 | 18g | 52g | 3g | 1g | 40g | 220mg |
FAQs About Pink Floral Buttercream Sheet Cake
Can I make this cake ahead of time?
Absolutely. You can bake the cake layer up to two days in advance. Wrap it well and store it at room temperature. The buttercream flowers can be made and frozen up to a week ahead. Assemble the cake the day before your event for the freshest taste.
What if I do not have piping tips?
You can still create a beautiful cake. Use a ziplock bag with a small corner cut off to pipe simple dots or swirls. You can also use a small spoon to create textured “roses” by placing small dollops of frosting in a circular pattern.
My buttercream is too runny. How can I fix it?
If your frosting is too soft, the most common fix is to chill it. Place the bowl of frosting in the refrigerator for 15-20 minutes. Then, whip it again. You can also add a little more powdered sugar to stiffen it up.
Can I use liquid food coloring?
It is not recommended. Liquid food coloring can add too much moisture to your buttercream, making it thin and difficult to pipe. Gel or powder food coloring is always best for frosting.
Final Thoughts
Creating this Pink Floral Buttercream Sheet Cake is a rewarding baking project. It allows you to express creativity while ending up with a delicious treat. Do not be intimidated by the beautiful flowers. With a little practice, anyone can master the basic piping techniques. Remember, the most important ingredient is patience.
Take your time with each cooling step and enjoy the process of decorating. Your friends and family will be amazed by your creation. So gather your ingredients, choose your colors, and get ready to bake a cake that is truly a work of art.