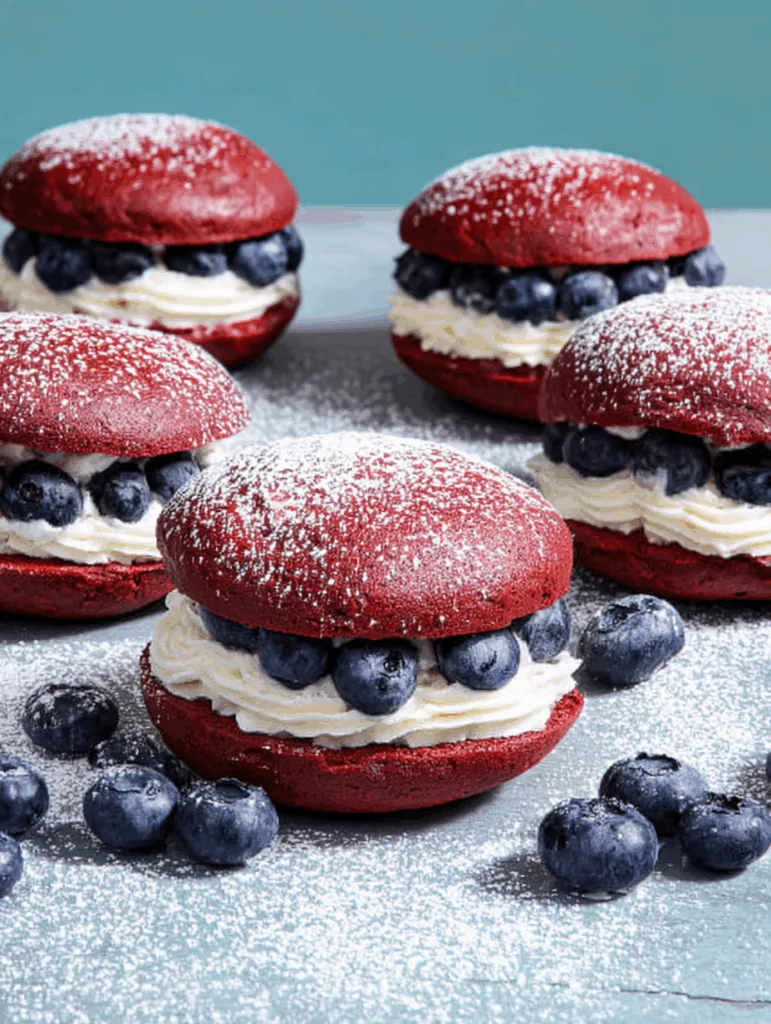
Imagine the rich tang of red velvet cake colliding with creamy filling and a burst of fresh blueberries. These Red Velvet Whoopie Pies with Blueberries turn any afternoon into a dessert dream. Soft, bright, and surprisingly easy, they’re the perfect marriage between elegance and fun ideal for impressing guests or spoiling yourself.
Baking the Perfect Red Velvet Whoopie Pies
These beauties are all about contrast: deep red cookies with a light, whipped filling and juicy berries. The trick lies in balancing flavor and texture think soft, cakey cookies that sandwich a creamy cloud. Before diving in, preheat your oven and clear some counter space. Your kitchen’s about to smell heavenly.
If you love rich yet simple desserts, you’ll adore these too check out the No-Bake Pistachio Cheesecake Bars for another dessert that’s smooth, indulgent, and ready to charm a crowd.
Recipe
Print
Whoopie pies au velours rouge et aux myrtilles
- Total Time: undefined
- Yield: undefined
Description
Soft, vibrant red velvet cookies sandwiched with fluffy cream cheese filling and fresh blueberries for a sweet, tangy, and colorful treat.
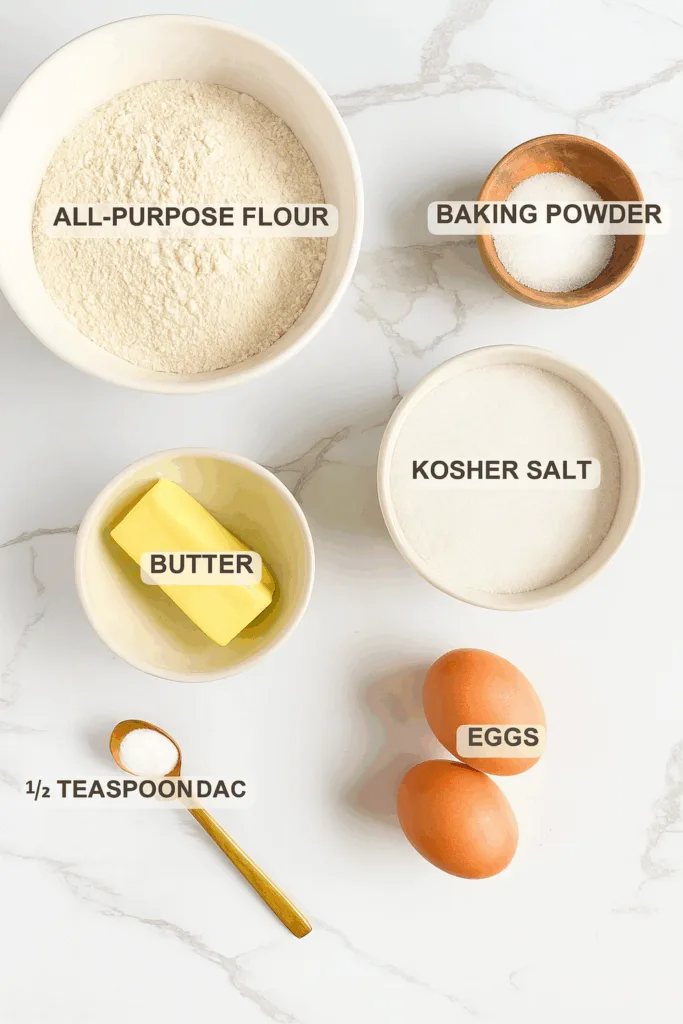
Ingredients
- 2 cups all-purpose flour (250 g)
- 1 tsp baking powder
- 3/4 tsp salt
- 1/2 tsp baking soda
- 1/2 cup butter (113 g), softened
- 1 cup granulated sugar (200 g)
- 2 large eggs
- 1/4 cup unsweetened cocoa powder (25 g)
- 1 Tbsp red food coloring
- 1/2 cup whole buttermilk (120 ml)
- 1 Tbsp distilled white vinegar (15 ml)
- 1 tsp vanilla extract
- 8 oz cream cheese (225 g), cold
- 1 1/2 cups powdered sugar (180 g)
- 1/2 tsp vanilla extract
- 1/4 tsp salt
- 1 1/2 cups whipping cream (360 ml)
- 1/2 cup chopped toasted pecans (50 g)
- 1 pt fresh blueberries (475 ml)
Instructions
- Preheat oven to 350°F (180°C) and line baking sheets with parchment paper.
- Whisk flour, baking powder, salt, and baking soda in a medium bowl.
- In a large bowl, beat butter and sugar with a mixer until fluffy.
- Add eggs one at a time, mixing well after each.
- Beat in cocoa powder and food coloring until smooth.
- Add buttermilk, vinegar, and vanilla; mix until combined.
- Fold in the dry ingredients in three additions, scraping the bowl after each.
- Scoop 1.5-tablespoon portions of batter onto sheets, spacing 2 inches apart.
- Bake for 10 minutes until tops are smooth and sides set; cool on racks.
- For the filling, beat cream cheese, powdered sugar, vanilla, and salt until smooth.
- Stream in cream and beat until stiff peaks form; fold in pecans.
- Pipe frosting onto half the cookies, top with blueberries, and sandwich with remaining cookies.
- Dust lightly with powdered sugar before serving.
Notes
- Cookies can be made ahead and stored airtight for up to 2 days.
- Filling can be prepared 1 day ahead; keep refrigerated.
- Use natural red coloring for a subtle hue if preferred.
- Blueberries can be swapped for raspberries or blackberries for a tart twist.
- Prep Time: undefined
- Cook Time: undefined
- Category: undefined
- Method: undefined
- Cuisine: undefined
Nutrition
- Serving Size: undefined
- Calories: undefined
- Sugar: undefined
- Sodium: undefined
- Fat: undefined
- Saturated Fat: undefined
- Unsaturated Fat: undefined
- Trans Fat: undefined
- Carbohydrates: undefined
- Fiber: undefined
- Protein: undefined
- Cholesterol: undefined
The Secret to Soft, Velvety Cookies
Every whoopie pie lover knows that the magic lies in texture that dreamy spot between cake and cookie. To achieve it, we balance moisture and structure. The result? A cookie that’s tender but sturdy enough to cradle a cloud of cream. The key players: proper mixing, the right temperature, and just enough patience to cool completely before filling.
When creaming the butter and sugar, don’t rush. Fluff equals air, and air equals softness. Once the eggs and cocoa join the mix, switch to low speed overmixing leads to dense cookies that lose their charm. And here’s a small trick: if your kitchen runs warm, chill the dough for 10 minutes before baking. It helps your cookies rise evenly and stay thick, not flat.
For more inspiration on sweet, no-stress desserts, you might like these No-Bake Boston Cream Pie Bars that melt in your mouth with every bite.
Balancing Moisture and Color
The signature scarlet hue of Red Velvet Whoopie Pies with Blueberries isn’t just for looks it’s also about flavor. The vinegar and cocoa combination gives that subtle tang that sets red velvet apart. Always sift your cocoa to prevent lumps, and use a gel-based red coloring for that rich tone without adding excess liquid.
Buttermilk keeps the crumb moist while giving each bite a touch of tang. If you don’t have it on hand, a mix of milk and a dash of vinegar does the job beautifully. The key is consistency smooth and pourable, never runny.
Want a refreshing fruit pairing idea? Check out these Blueberry Hand Pies for another way to make the most of those juicy blue gems.
Texture Troubleshooting Table
If your cookies come out slightly off, here’s a quick fix guide:
| Problem | Likely Cause | Quick Fix |
|---|---|---|
| Cookies too flat | Overmixed batter or too warm | Chill dough 10 minutes before baking |
| Dry or crumbly | Too much flour or overbaked | Reduce bake time by 1–2 minutes |
| Pale color | Low food coloring quality | Use gel-based coloring for rich hue |
The Dreamy Cream Cheese Filling
Cream cheese frosting is the heart of any whoopie pie worth its name. The goal is to make it fluffy yet stable a filling that doesn’t ooze when you bite into it. Start by beating cold cream cheese with powdered sugar until it looks like soft snowflakes. Add vanilla and a touch of salt to bring out that classic tangy balance.
Then comes the magic moment: streaming in chilled whipping cream. Don’t rush it. The slow pour lets the mixture transform from dense to dreamy in minutes. Once you see stiff peaks form, stop mixing immediately you’ve hit the sweet spot. The texture should be thick enough to pipe and smooth enough to spread.
If you’re after a fun no-bake version of this creamy bliss, try the Churro Cheesecake Bars they deliver the same luscious bite, minus the oven time.
Folding and Flavor Upgrades
Once your filling is ready, fold in finely chopped toasted pecans for a bit of crunch. The contrast between the nutty texture and the soft cookie is pure joy. Don’t overmix at this stage you want visible flecks, not pecan dust.
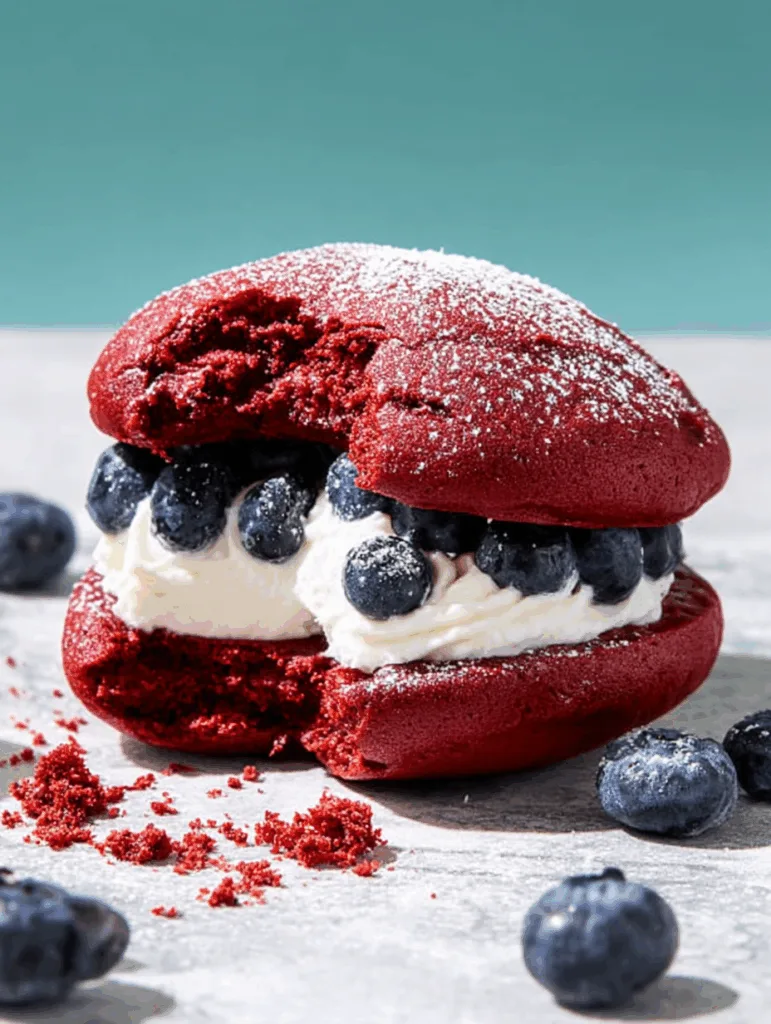
Now, grab your piping bag and fit it with a large star tip. Flip half the cookies so their flat sides face up and pipe a generous swirl of frosting onto each one. Before sealing the deal, scatter fresh blueberries on top of the cream. Their tang cuts the sweetness perfectly and adds that little burst of color that makes these whoopie pies photo-ready.
When everything’s assembled, dust the tops lightly with powdered sugar it’s the final snow-kissed touch that makes each cookie sandwich look straight out of a bakery window.
Serving Tips
These Red Velvet Whoopie Pies with Blueberries are best enjoyed chilled. Store them in an airtight container in the fridge for up to three days. Let them rest at room temperature for about 10 minutes before serving for the perfect texture.
For a refreshing drink pairing, they go beautifully with a creamy milkshake like this No-Bake Banana Split Dessert the fruity contrast keeps things balanced and bright.
Creative Serving & Sweet Variations
There’s something wonderfully nostalgic about whoopie pies they’re part cookie, part cake, and completely irresistible. Once your Red Velvet Whoopie Pies with Blueberries are cooled and dusted, you’re ready to turn dessert into a moment worth savoring.
Serve them stacked on a tiered platter, each one a pop of red and blue that begs to be picked up. For extra flair, drizzle a thin ribbon of melted white chocolate over the tops before serving. It adds just enough shine to make your guests think you moonlight as a pastry chef.
If you’re prepping for a party, wrap each pie in parchment and tie it with a small string. They hold beautifully in the fridge for up to three days, making them a stress-free choice for gatherings.
And if your sweet tooth leans toward creamy treats, the No-Bake Cheesecake Recipes collection on Tuck In Bites has plenty more ideas to keep dessert hour endlessly exciting.
Fun Flavor Variations
One of the joys of this recipe is how easily it adapts. Here are a few twists to keep things interesting:
- Berry Swap: Replace blueberries with raspberries or sliced strawberries for a sweeter contrast.
- Nut Lovers’ Dream: Try crushed pistachios instead of pecans for a subtle green crunch and elegant look.
- Chocolate Drizzle: Add a drizzle of dark chocolate ganache to turn these pies into Valentine’s showstoppers.
- Citrus Kiss: A few drops of orange extract in the filling adds a fresh twist that brightens every bite.
If you’re into fruity desserts with visual flair, you’ll love the No-Bake Pistachio Cheesecake Bars another stunning treat that’s as easy as it is elegant.
Final Thoughts
Red Velvet Whoopie Pies with Blueberries are proof that dessert doesn’t have to be complicated to feel luxurious. Each bite blends soft, cocoa-rich cookies with fluffy cream and bursts of fresh blueberry brightness. Whether you’re baking for guests or just treating yourself, these pies make any day feel like a celebration.