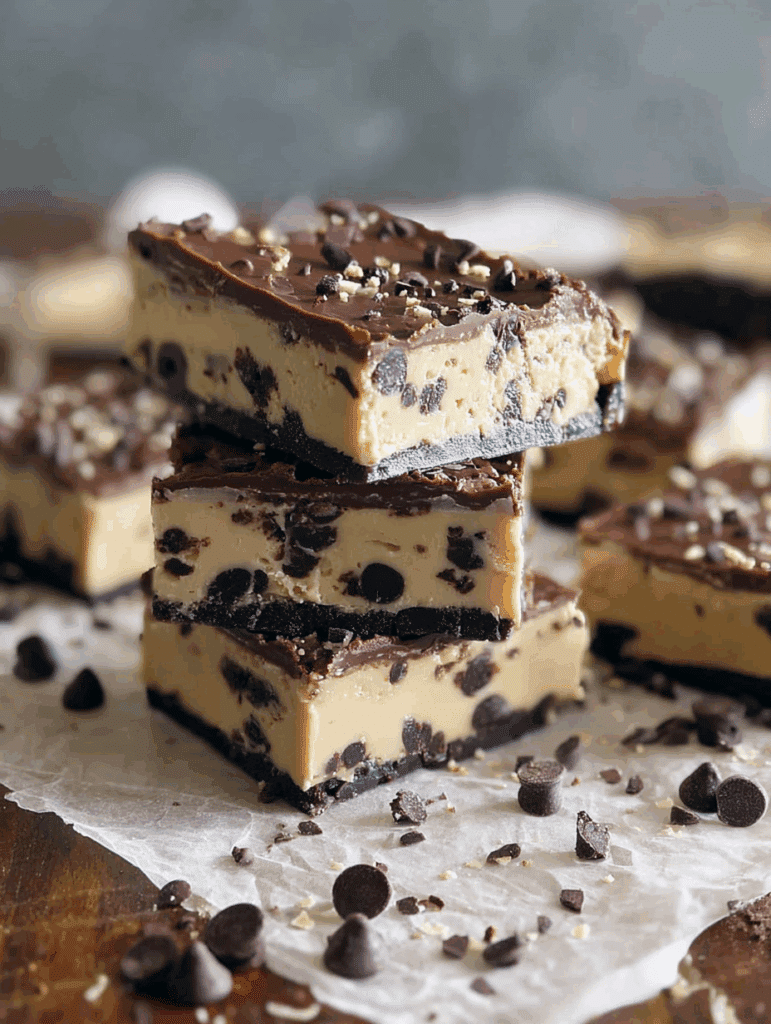
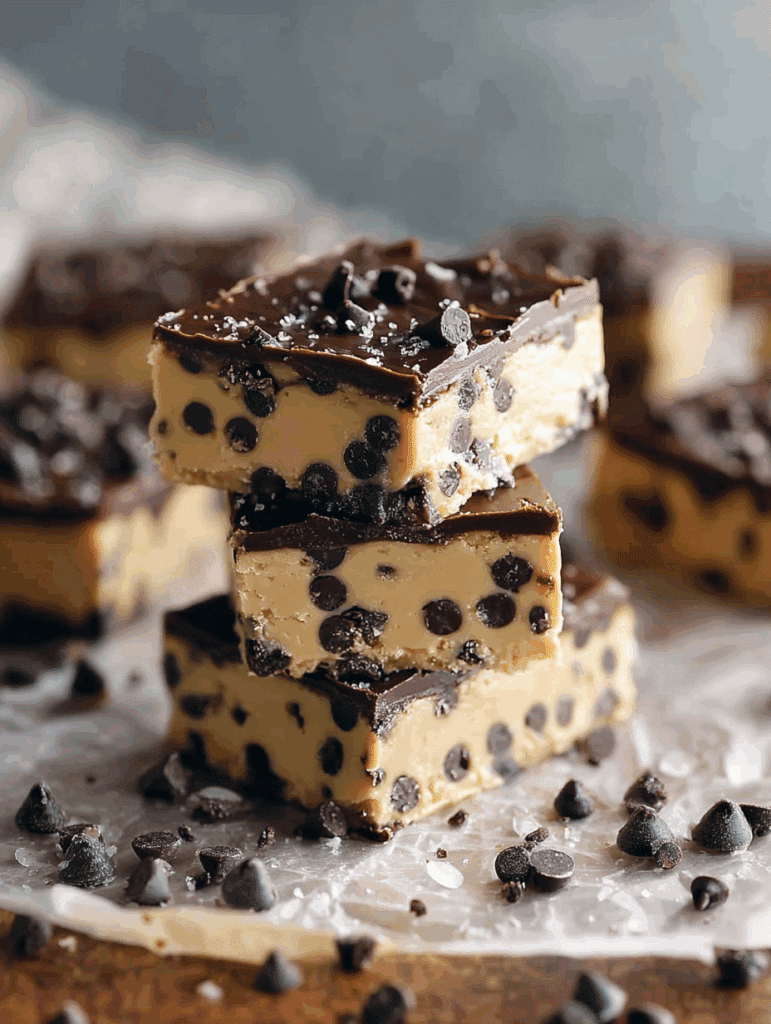
Rich, chewy, and packed with chocolate chips, these no bake cookie dough bars are your ticket to dessert bliss. They’re quick to prepare, freezer-friendly, and ideal for busy weeknights or last-minute parties.
Why You’ll Love These No Bake Cookie Dough Bars
Safe-to-Eat Cookie Dough in Bar Form
Let’s be honest. Most of us sneak a bite of cookie dough straight from the bowl. With this recipe, you don’t have to feel guilty about it. These bars skip the eggs completely and use heat-treated flour, making them safe to eat straight from the fridge. Whether you microwave the flour for a couple of minutes or bake it briefly, you’ll have a clean, ready-to-use base.
Soft, Chewy and Loaded with Chocolate Chips
The texture is what makes these no bake cookie dough bars so satisfying. They’re soft, rich, and packed with melty chocolate chips. Thanks to a blend of melted butter, milk, and sugars, the dough stays moist and sliceable.
Here’s what you’ll love about them:
- No oven needed, which means less prep and no heat in the kitchen
- Safe to eat thanks to heat-treated flour and no eggs
- Easy to customize with chocolate chips, nuts, or candy bits
- Freezer-friendly and great for make-ahead treats
- Perfect texture for slicing into bars
They’re also a fun option to add to dessert trays alongside treats like these No-Bake Pistachio Cheesecake Bars or the classic No-Bake Lunch Lady Peanut Butter Bars.
Whether you’re prepping dessert for a birthday, potluck, or cozy movie night, these bars are a fast favorite.
Recipe
Print
No Bake Cookie Dough Bars
- Total Time: 2 hours
- Yield: 12–16 bars 1x
- Diet: Vegetarian
Description
These no bake cookie dough bars are rich, soft, and packed with chocolate chips. They’re quick to prep, no oven required, and a perfect treat for families or parties.
Ingredients
- 1 1/2 cups all-purpose flour [180 g] (heat-treated)
- 1/2 cup unsalted butter, melted [113 g]
- 1/2 cup brown sugar, packed [100 g]
- 1/4 cup granulated sugar [50 g]
- 1/4 cup milk (or dairy-free milk) [60 ml]
- 1 teaspoon vanilla extract [5 ml]
- 1/4 teaspoon salt [1.5 g]
- 1 cup mini chocolate chips (or chopped regular chips) [170 g]
Instructions
- Heat the flour in the microwave for 1–2 minutes or bake it at 350°F (175°C) for 5–10 minutes. Let it cool.
- In a large bowl, stir together melted butter, brown sugar, granulated sugar, milk, vanilla, and salt until smooth.
- Gradually add the flour and mix until combined. If dough is dry, add 1 tablespoon of milk at a time.
- Fold in mini chocolate chips evenly.
- Press dough into a lined or greased 8×8 inch pan.
- Chill for at least 1–2 hours until firm.
- Cut into bars and serve.
Notes
- Add-ins like chopped nuts, sprinkles, or candy bits work great.
- Store in an airtight container in the fridge for up to 1 week.
- Use plant-based butter and milk for a dairy-free version.
- Prep Time: 10 minutes
- Cook Time: 0 minutes
- Category: Dessert
- Method: No-Bake
- Cuisine: American
Nutrition
- Serving Size: 1 bar
- Calories: 220
- Sugar: 15g
- Sodium: 90mg
- Fat: 11g
- Saturated Fat: 7g
- Unsaturated Fat: 3g
- Trans Fat: 0g
- Carbohydrates: 28g
- Fiber: 1g
- Protein: 2g
- Cholesterol: 15mg
Creative Twists for Your No Bake Cookie Dough Bars
Flavor Variations to Try at Home
One of the best parts about no bake cookie dough bars is how easy they are to customize. Whether you’re serving picky kids or adventurous guests, you can easily adapt the flavor without changing the prep.
Try these fun and flavorful ideas:
- Double Chocolate: Add 2 tablespoons of unsweetened cocoa powder to the flour before mixing
- Birthday Bar: Mix in colorful sprinkles and a dash of almond extract for a party-ready version
- Cookie Crunch: Fold in crushed sandwich cookies or crispy cereal for texture
- Nutty Delight: Stir in a handful of chopped pecans or almonds for a nutty bite
- Toffee Chip Magic: Swap half the chocolate chips with toffee bits for a caramel crunch
Each variation adds a new twist without changing the method. These swaps pair wonderfully with other no bake favorites like the creamy Dolly Parton No-Bake Dessert or the dreamy No-Bake Banana Split Dessert.
Simple Ingredient Swaps That Work
Need to make it dairy-free or suit other dietary needs? No problem. This recipe is super flexible and forgiving.
Here are some easy swaps:
- Butter → Use dairy-free butter spread for the same richness
- Milk → Try oat milk, almond milk, or any unsweetened plant-based milk
- Chocolate Chips → Choose dark chocolate chunks, chopped baking chocolate, or dairy-free chips
- Sugar Mix → Use coconut sugar in place of brown or a sugar substitute if needed
For even more no bake inspiration, check out these No-Bake Cannoli Delight Bars or these rich No-Bake Caramel Cheesecake Shooters. They offer a similar level of indulgence with the same minimal effort.
These no bake cookie dough bars are incredibly forgiving. Whether you stick to the original recipe or play around with new ingredients, they’re guaranteed to satisfy your sweet tooth.
Serving Tips and Make-Ahead Magic
How to Serve No Bake Cookie Dough Bars Like a Pro
Once these bars have chilled and set, you’ve got a dessert that’s ready for just about anything. Whether you’re slicing them into big squares for a crowd or smaller bites for party platters, they hold their shape beautifully and always get compliments.
Here are a few fun serving suggestions:
- Chill and Cut Clean: Use a sharp knife and wipe it between cuts for neat squares
- Drizzle It Up: Melt a little extra chocolate and drizzle over the top before slicing
- Layer with Ice Cream: Add a scoop of vanilla or dairy-free ice cream for an instant sundae
- Dip in Chocolate: Slice into small squares and dip half into melted chocolate for a polished finish
They’re ideal for birthdays, bake sales, or just because it’s Tuesday. You can also add them to your dessert boards along with treats like No-Bake Twix Cheesecake or crunchy No-Bake Pecan Praline Cookies.
How to Store and Prep Ahead
One of the biggest wins with no bake cookie dough bars is how well they store. Make them ahead, chill overnight, and they’ll be ready when you are.
Follow these easy storage tips:
- Fridge: Keep in an airtight container for up to 1 week
- Freezer: Freeze in layers between parchment paper for up to 2 months
- Serving from Frozen: Let them sit at room temp for 10 to 15 minutes before enjoying
- On-the-Go: Pack into lunchboxes or snack containers for travel-friendly bites
These prep-ahead perks make them a top pick for busy families. Want more no bake options that chill beautifully? Try our No-Bake Pistachio Cheesecake Bars or smooth No-Bake Caramel Cheesecake Shooters.
When dessert is this easy and reliable, it’s always the right choice.
Easy Add-Ons and Seasonal Spins
Make It Festive Year-Round
These no bake cookie dough bars are versatile enough to dress up for every season. With a few small tweaks, you can turn this simple recipe into a themed dessert that fits any holiday table or celebration.
Try these seasonal spins:
- Spring: Add pastel sprinkles or crushed freeze-dried strawberries
- Summer: Mix in chopped dried fruit and drizzle with melted white chocolate
- Fall: Stir in cinnamon chips and a pinch of pumpkin spice
- Winter: Use crushed candy canes or swirl in a spoonful of nut butter
Looking to keep the no-bake theme going all season? Pair your bars with something like this No-Bake Banana Split Dessert for summer gatherings or the indulgent Dolly Parton No-Bake Dessert for wintertime sweet tables.
Final Tips to Nail It Every Time
No bake cookie dough bars are forgiving, but a few smart moves can take them from good to great.
Keep these tips in mind:
- Don’t skip heating the flour, this step ensures it’s safe to eat
- Always chill the bars long enough to let them firm up before slicing
- Use mini chocolate chips for better distribution in every bite
- Adjust sweetness with a pinch more salt or by swapping some sugar for a less refined option
These bars are designed to be simple and flexible. Once you’ve made them once, you’ll want to try new variations again and again.
Final Thoughts
No bake cookie dough bars are the kind of treat that checks every box. Quick to prep, easy to personalize, and always a hit with kids and adults alike. Whether you’re packing school lunches, building a party platter, or just want a sweet reward at the end of the day, this recipe keeps things simple and satisfying. Make it your own, store it with ease, and enjoy joy in every bite.