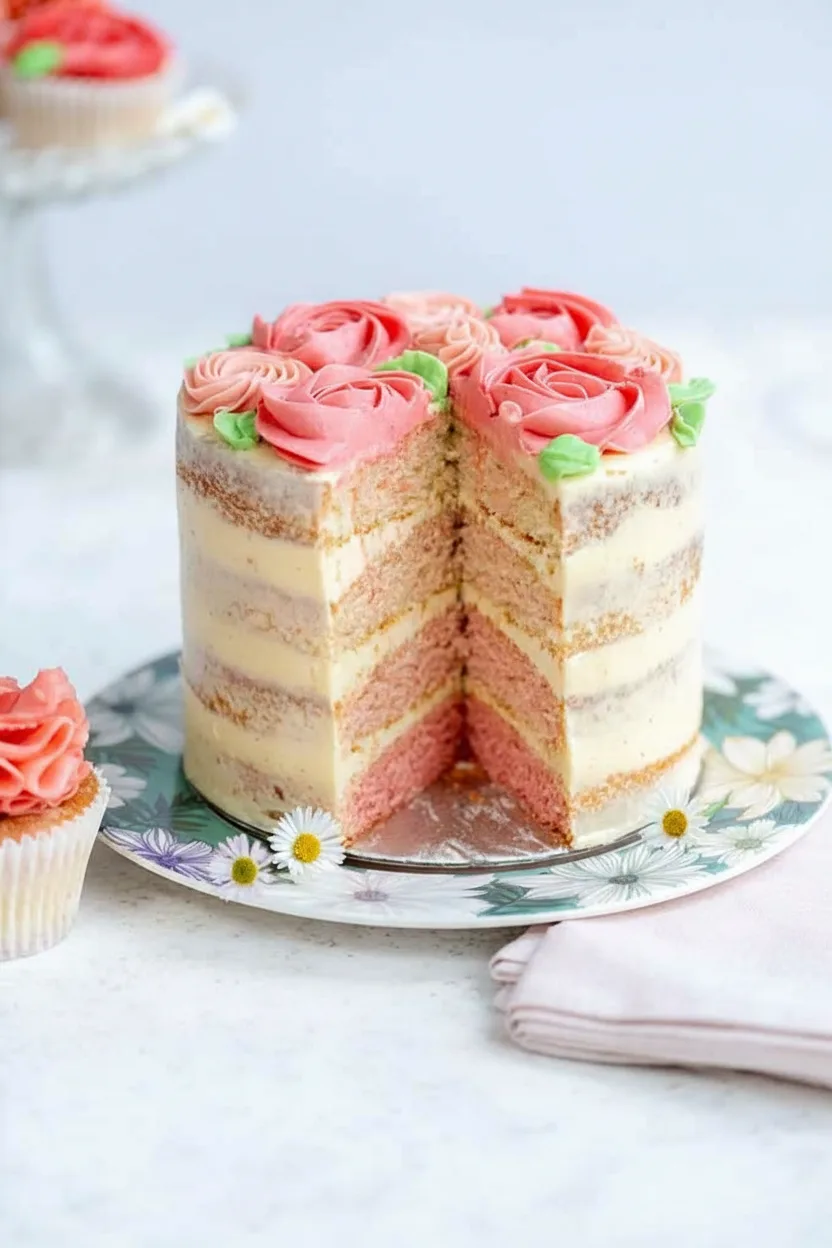
Welcome to the world of stunning homemade cakes. This Ombre Pink Baby In Bloom Cake is a true showstopper, perfect for baby showers, birthdays, or any celebration that calls for a touch of floral sweetness. Imagine tender vanilla almond cake layers, each one a slightly deeper shade of pink than the last, all stacked high and enveloped in a cloud of fluffy vanilla buttercream.
This cake isn’t just delicious; it’s a beautiful centerpiece that looks like it came from a professional bakery. But don’t worry, we break it down into simple, easy-to-follow steps. You’ll learn how to create that perfect ombre gradient and bake a cake that’s as moist as it is gorgeous. Let’s get started on this baking adventure.
Why You’ll Love This Ombre Pink Cake
This cake recipe offers several key benefits. First, the flavor is simply divine. The combination of vanilla and almond extracts gives the cake a classic, comforting taste that pairs perfectly with the sweet buttercream.
The texture is incredibly light and tender, thanks to the careful mixing method. The ombre design is surprisingly simple to achieve but creates a stunning visual impact. People will be amazed that you made it yourself.
Furthermore, the recipe is structured and reliable, guiding you through each stage from mixing to frosting. You will feel a great sense of accomplishment when you present this beautiful creation. Finally, it’s a versatile base. You can easily adapt the colors for different themes or change the extract flavors to suit your preference.
Recipe
Print
Ombre Pink Baby In Bloom Cake
- Total Time: 40 min
- Yield: 10 servings 1x
Description
A stunning layered cake with beautiful pink ombre shades, flavored with vanilla and almond, and covered in fluffy vanilla buttercream.
Ingredients
- 340 g (1 3/4 cups) granulated sugar
- 255 g (2 1/4 cups) plain flour
- 4 tsp baking powder
- 1/2 tsp salt
- 170 g (1 1/2 sticks) unsalted butter, cold and cubed
- 240 ml (1 cup) whole milk, room temperature
- 180 ml (3/4 cup) pasteurized liquid egg whites
- 2 tsp almond extract
- 1 tsp vanilla extract
- Pink paste food coloring
- 180 ml (3/4 cup) pasteurized liquid egg whites
- 500 g (about 6 cups) icing sugar
- 500 g (about 2 1/4 cups) unsalted butter, room temperature
- 1 tbsp vanilla extract
- 1/4 tsp salt
Instructions
- Preheat oven to 180C/350F. Prepare four 6-inch cake pans with non-stick spray and parchment.
- Weigh stand mixer bowl. Add flour, sugar, baking powder, salt. Mix on low to combine.
- Add cold cubed butter. Mix on low until mixture resembles coarse sand.
- In a jug, mix milk, egg whites, almond extract, and vanilla extract.
- With mixer on low, add liquid ingredients to dry in three parts, mixing well after each.
- Increase speed to medium and beat for 2 minutes until smooth.
- Weigh full bowl, subtract empty weight. Divide batter weight by four for portion size.
- Pour one untinted portion into first pan for white layer.
- Take a ladle of batter, tint dark pink in a small bowl.
- Add dark pink batter back to main bowl, mix for pale pink layer. Pour into second pan.
- Add more dark pink batter to main bowl, mix for medium pink layer. Pour into third pan.
- Add remaining dark pink batter to main bowl, mix for dark pink layer. Pour into fourth pan.
- Bake for 20-25 minutes until golden and a skewer comes out clean.
- Cool in pans 10 minutes, then turn out onto wire rack to cool completely.
- For buttercream, combine egg whites and icing sugar over simmering water. Whisk until warm and sugar dissolved.
- Transfer to stand mixer, whip on high until stiff, glossy peaks form and bowl is cool.
- With mixer on medium, add room temperature butter one piece at a time. Whip until smooth.
- Beat in vanilla extract and salt.
- Assemble cake from darkest to lightest layer with buttercream between each.
- Apply a thin crumb coat of buttercream, chill 20 minutes, then frost with final layer.
Notes
- Use gel or paste food coloring for best, most vibrant results.
- A kitchen scale ensures even batter division for perfect ombre layers.
- Ensure butter is at room temperature for smooth, creamy buttercream.
- Cakes must be completely cool before frosting to prevent melting.
- Prep Time: 15 min
- Cook Time: 25 min
- Category: Main Course
- Method: Baked
- Cuisine: American
Nutrition
- Calories: 928 kcal
- Sugar: 83 g
- Sodium: 664 mg
- Fat: 55 g
- Carbohydrates: 105 g
- Fiber: 1 g
- Protein: 7 g
Ingredients and Substitutions
Gathering the right ingredients is the first step to baking success. Here is what you’ll need, along with some helpful swaps if necessary.
Base Components
- Granulated Sugar: 340 grams (1 3/4 cups) provides sweetness and helps create a tender crumb.
- Plain Flour: 255 grams (2 1/4 cups) is the foundation of the cake. For a lighter texture, you can substitute cake flour.
- Baking Powder: 4 teaspoons acts as the leavening agent to help the cake rise.
- Salt: 1/2 teaspoon balances and enhances all the other flavors.
- Unsalted Butter: 170 grams (1 1/2 sticks), cold and cubed, is cut into the dry ingredients for a rich, tender texture.
- Whole Milk: 240 milliliters (1 cup), ideally at room temperature, adds moisture. Any milk will work.
- Pasteurized Liquid Egg Whites: 180 milliliters (3/4 cup) or from about 6 large eggs. Using carton egg whites is convenient and reduces waste.
- Extracts: 2 teaspoons almond extract and 1 teaspoon vanilla extract give the cake its signature aroma and flavor.
- Pink Paste Food Coloring: This concentrated gel color is best for achieving vibrant, non-runny shades without thinning the batter.
Frosting Components
- Pasteurized Liquid Egg Whites: Another 180 milliliters (3/4 cup) for the Swiss meringue buttercream.
- Icing Sugar: 500 grams (about 6 cups) sweetens and stabilizes the buttercream.
- Unsalted Butter: 500 grams (about 2 1/4 cups or 4 1/2 sticks), at room temperature, creates the creamy base.
- Vanilla Extract: 1 tablespoon for flavor.
- Salt: 1/4 teaspoon to cut the sweetness.
How to Make Ombre Pink Baby In Bloom Cake
Follow these steps to create your beautiful layered masterpiece. The process is methodical but very straightforward.
Step 1: Prepare and Mix the Batter
First, preheat your oven to 350 degrees Fahrenheit (180 degrees Celsius). Next, prepare four 6-inch (15 cm) round cake pans by spraying them with non-stick baking spray and lining the bottoms with parchment paper. Then, place the bowl of your stand mixer on a kitchen scale and note its weight.
After that, add the flour, sugar, baking powder, and salt to the bowl. Briefly mix them together with the paddle attachment on low speed. Now, add the cold, cubed butter. Beat on low speed until the mixture looks like coarse sand. In a separate jug, whisk together the milk, egg whites, almond extract, and vanilla extract.
With the mixer on low, add the liquid ingredients to the dry mixture in three parts. Mix well after each addition. Finally, increase the speed to medium and beat for about two minutes until the batter is smooth and well combined.
Step 2: Create the Ombre Layers
This is the fun part. First, weigh your full mixing bowl again. Subtract the weight of the empty bowl to find the total weight of your batter. Divide this number by four. This is the amount of batter you need for each pan. Now, pour one portion of plain, untinted batter into your first prepared pan. This is your white layer.
Next, take a ladleful of batter and place it in a small bowl. Use pink paste food coloring to tint it a fairly strong, dark pink shade. Add this small amount of dark pink batter back into the main mixing bowl. Mix thoroughly until the batter is a uniform, pale pink color. Pour this pale pink batter into the second pan.
Then, add another small amount of your reserved dark pink tinted batter to the mixing bowl. Mix again to create a medium pink shade. Pour this into the third pan. Finally, add the remaining dark pink batter to the bowl and mix for your final, deepest pink layer. Pour this into the fourth pan.
Step 3: Bake and Cool
Carefully place all four cake pans in the preheated oven. Bake for 20 to 25 minutes. The cakes are done when they are golden, spring back when touched, and a toothpick inserted into the center comes out clean. Let the cakes cool in their pans for 10 minutes. Then, run a knife around the edges and gently turn them out onto a wire rack to cool completely. Cooling is crucial before frosting.
Step 4: Make the Buttercream and Assemble
For the buttercream, you’ll make a Swiss meringue base. Combine the egg whites and icing sugar in a heatproof bowl set over a pot of simmering water. Whisk constantly until the sugar dissolves and the mixture is warm to the touch.
Transfer to a stand mixer and whip on high speed until you get stiff, glossy peaks and the bowl is cool. Then, with the mixer on medium speed, add the room-temperature butter one piece at a time. Whip until the buttercream is very smooth and fluffy. Beat in the vanilla extract and salt.
To assemble, place your darkest pink layer on a cake board or plate. Spread a layer of buttercream on top. Repeat with the medium pink, then the light pink, and finally the white layer on top. Apply a thin crumb coat of buttercream over the entire cake, chill for 20 minutes, then apply the final, smooth layer of frosting. Decorate as desired.
Pro Tips for Success
Use a kitchen scale for the most accurate measurements, especially for dividing the batter evenly. Room temperature milk helps the batter come together smoothly. Gel or paste food coloring is essential for vibrant colors without altering the batter’s consistency.
If you only have three 8-inch pans, you can bake three slightly thicker layers instead of four. Ensure your butter is truly at room temperature for the buttercream to avoid a grainy texture. A good offset spatula and a turntable make frosting this cake much easier. For a flawless finish, try our cooling cucumber ranch salad as a refreshing side for your celebration meal.
Flavor Variations
This cake is wonderfully adaptable. For a different flavor profile, replace the almond extract with more vanilla, or try lemon or coconut extract. You can also change the food coloring to match any theme. Use blue for a baby boy, yellow for a sunny birthday, or purple for a royal celebration.
For the frosting, you can add a few tablespoons of fruit powder, like strawberry or raspberry, for a natural pink tint and a hint of fruit flavor. Consider adding a thin layer of seedless raspberry jam between the cake layers for a burst of tangy fruitiness. For another layered dish idea, check out our vibrant Mediterranean orzo salad.
Serving Suggestions
This cake is a celebration centerpiece all on its own. Slice it carefully to reveal the beautiful ombre layers inside. Serve each slice with a dollop of freshly whipped cream or a scoop of vanilla bean ice cream. For a complete party spread, pair it with lighter fare.
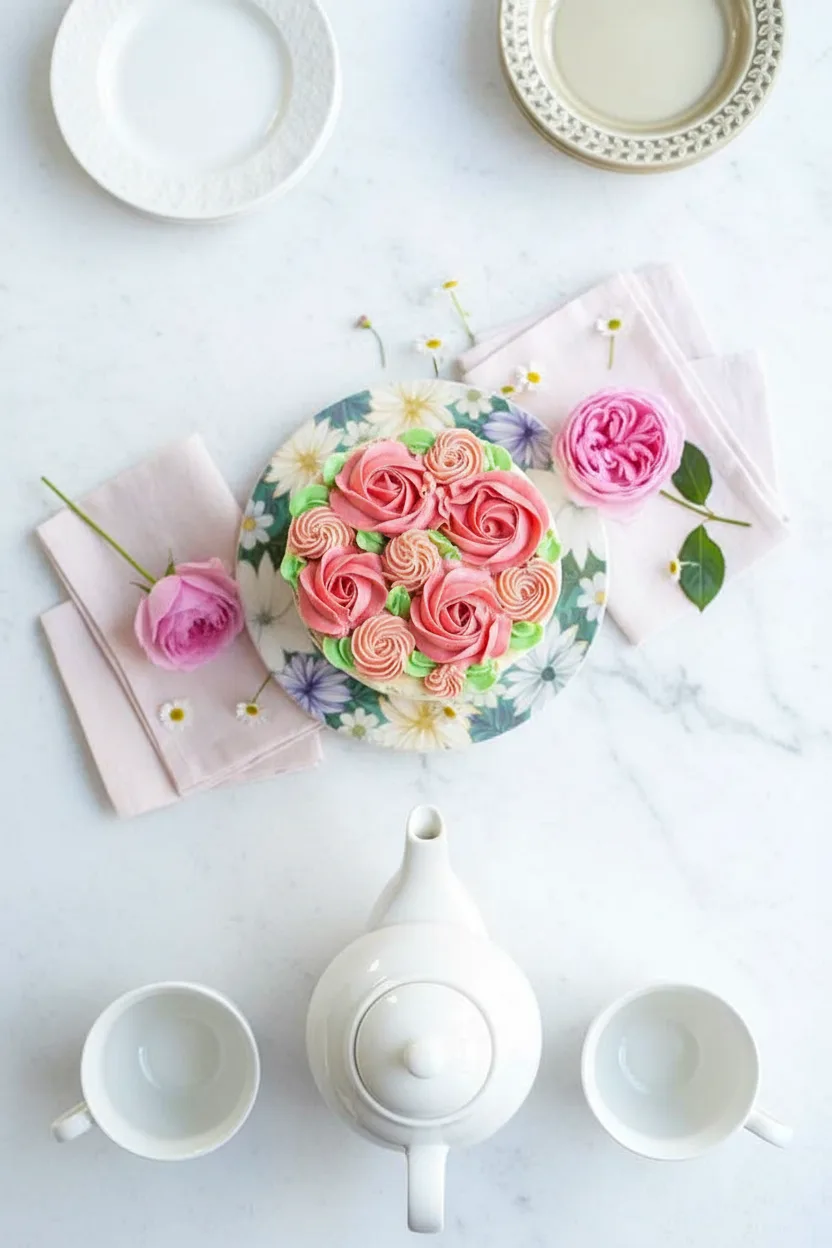
Fresh fruit platters, cheese boards, and finger sandwiches complement the sweet cake nicely. A pot of tea or coffee is the perfect beverage accompaniment. For a savory pairing that balances the sweetness, a classic Greek salad with fresh feta offers a crisp, tangy contrast.
Storage and Freezing Instructions
Store any leftover cake in an airtight container at room temperature for up to two days. For longer storage, keep it in the refrigerator for up to five days. Let it sit at room temperature for an hour before serving for the best texture. You can also freeze the cake layers for up to three months.
Wrap each cooled layer individually in plastic wrap and then aluminum foil before freezing. Thaw overnight in the refrigerator before frosting. The buttercream can be made ahead and stored in the fridge for a week or frozen for three months. Simply re-whip it to restore its fluffy texture.
Nutrition Facts per Serving
| Calories | Fat | Carbs | Protein | Fiber | Sugar | Sodium |
|---|---|---|---|---|---|---|
| 928 kcal | 55 g | 105 g | 7 g | 1 g | 83 g | 664 mg |
FAQs About Ombre Pink Cake
Can I make this cake in different sized pans?
Yes, you can. For three 8-inch pans, the layers will be slightly thicker, so you may need to add a few minutes to the baking time. Always check for doneness with a toothpick. For a sheet cake, pour all the batter into a prepared 9×13-inch pan and adjust the baking time accordingly.
Why did my buttercream look curdled?
This is common and usually fixable. Swiss meringue buttercream can look soupy or curdled if the meringue is too warm or the butter is too cold. Just keep mixing on medium-high speed. It will eventually come together into a smooth, silky frosting. If it’s too soft, chill the bowl for 15 minutes and re-whip.
Can I use liquid food coloring?
It’s not recommended. Liquid food coloring can add too much moisture to the batter and dilute the colors. Gel or paste colors are highly concentrated, so you need less, and they won’t change the batter’s consistency. They give you the best, most vibrant results for an ombre effect.
How do I get my frosting so white?
For a pure white buttercream, use a clear vanilla extract. The regular kind can give the frosting a slight off-white or yellow tint. Also, make sure your butter is very pale and fresh. European-style butters often have a brighter yellow color, which will affect the final shade of your frosting.
What’s the best way to create the ombre effect?
The key is to start with a small amount of very dark, concentrated color in a separate bowl. Then, you add this colored batter back into the main bowl in increasing amounts. Mix thoroughly between each addition to ensure the color is even. This method gives you full control over the gradient.
Final Thoughts
Creating this Ombre Pink Baby In Bloom Cake is a rewarding baking project that yields spectacular results. The process is a delightful blend of precise technique and creative expression. You’ll learn valuable skills like making a tender cake crumb and a silky buttercream.
Moreover, you’ll master the art of the ombre gradient. This cake is sure to impress your guests and become a requested favorite for special occasions. Remember to take your time, follow the steps, and have fun with the colors. Happy baking.