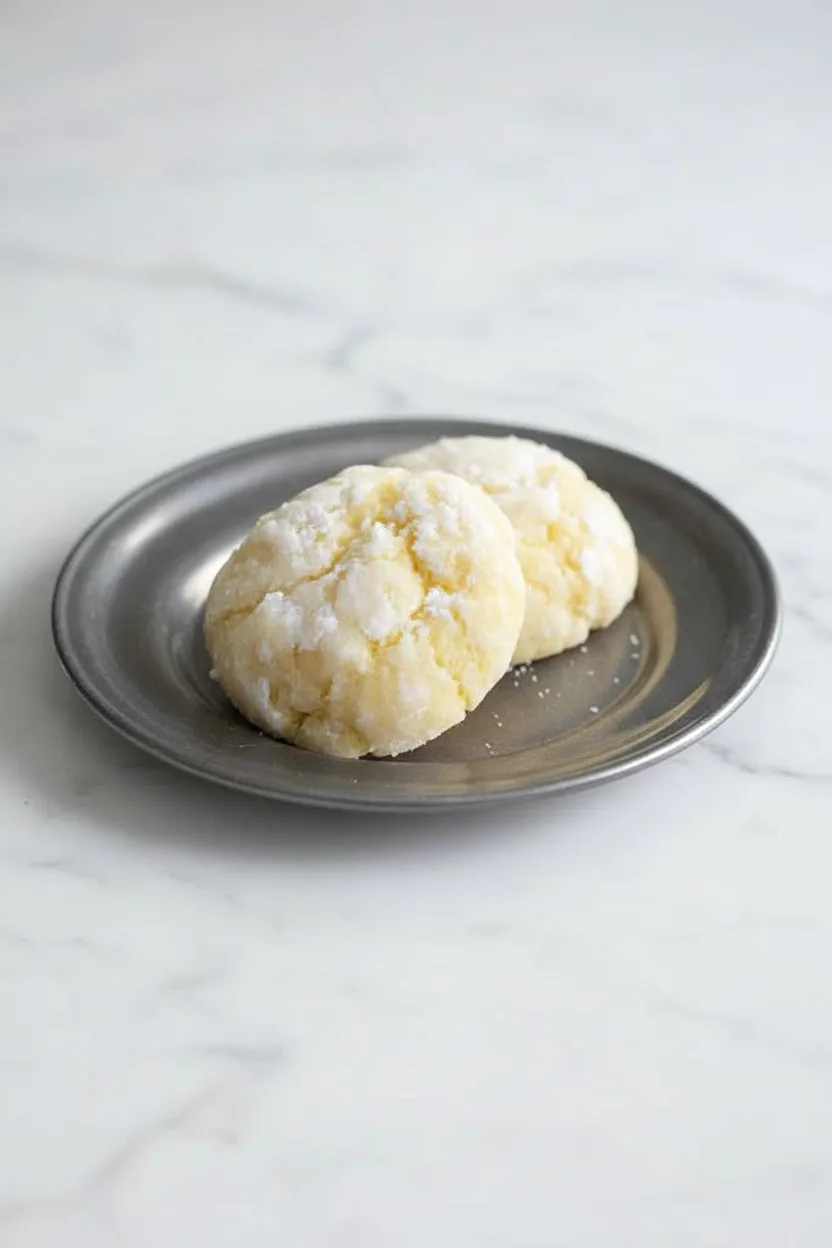
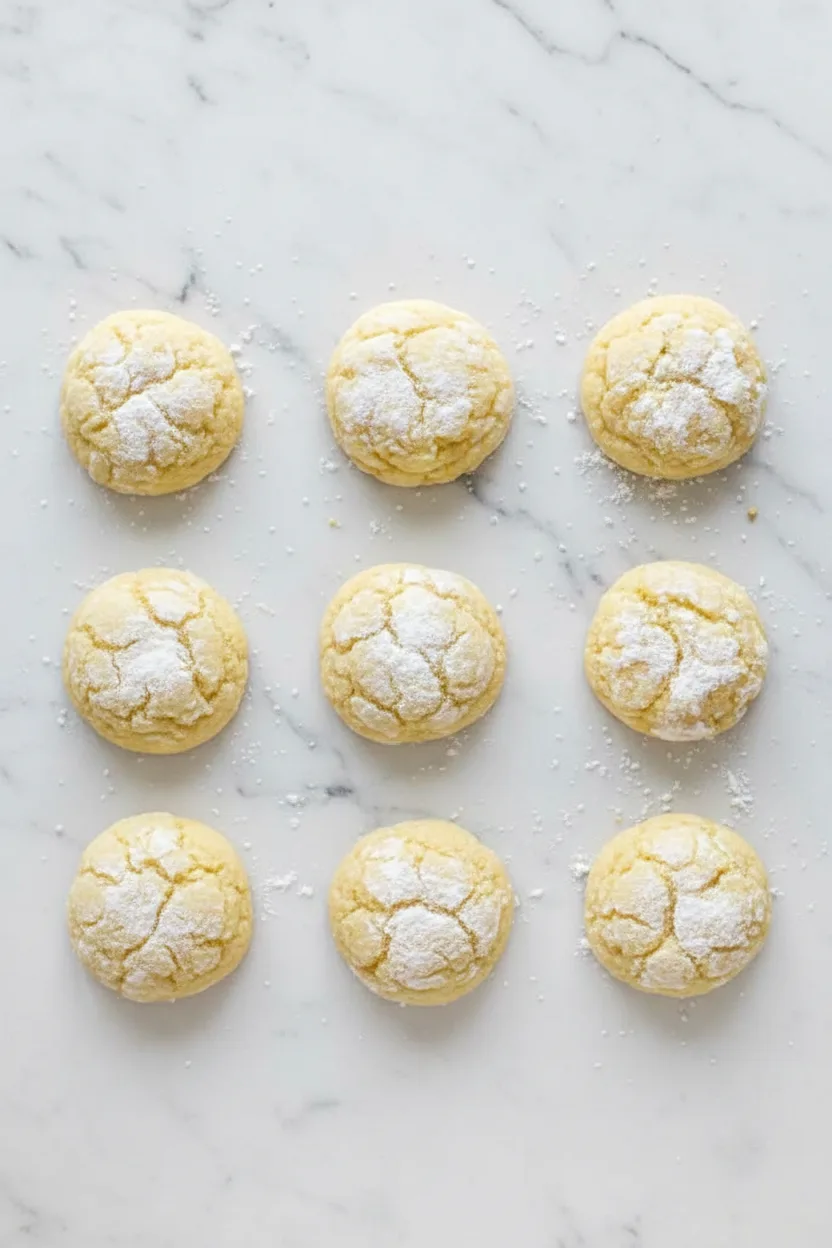
These delightful Gluten Free Lemon Crinkle Cookies are a burst of sunshine in every bite. Soft, chewy, and coated in a snowy layer of powdered sugar, they offer the perfect balance of sweet and tart. Moreover, they are incredibly easy to make and require no special skills.
Whether you’re new to gluten-free baking or a seasoned pro, this recipe guarantees success. Consequently, you’ll want to make them for every gathering, picnic, or simply as a sweet treat for yourself. Let’s dive into the world of these zesty, crinkly wonders.
Why You’ll Love This Recipe
First and foremost, these cookies are irresistibly delicious. The bright lemon flavor shines through, complemented by the tender, melt-in-your-mouth texture. Secondly, they are naturally gluten-free, making them a safe and enjoyable option for those with dietary restrictions. Additionally, the process is straightforward and fun.
From mixing the dough to rolling the cookies in powdered sugar, it’s a joyful baking experience. Finally, the visual appeal is undeniable. The classic crinkle pattern and snowy white coating make these cookies look as good as they taste. Therefore, they are sure to impress anyone who tries them.
Recipe
Print
Gluten Free Lemon Crinkle Cookies
- Total Time: 32 minutes
- Yield: 16 servings 1x
Description
Soft, chewy gluten-free cookies bursting with fresh lemon flavor and coated in a snowy layer of powdered sugar.
Ingredients
- 1 1/2 cups all purpose gluten free flour blend (180 g)
- 3/4 teaspoon xanthan gum (3 g) (omit if your blend already contains it)
- 1/4 cup cornstarch (30 g) (if you’re using Cup4Cup, replace cornstarch with more Cup4Cup)
- 1 teaspoon baking powder (4 g)
- 1/2 teaspoon kosher salt (3 g)
- 7/8 cup granulated sugar (175 g)
- Zest of 1 lemon (finely grated (at least 1 heaping tablespoon))
- 10 tablespoons unsalted butter (at room temperature) (140 g)
- 2 eggs (at room temperature, beaten)
- Juice of 1 lemon ((at least 2 generous tablespoons))
- 1 cup confectioners’ sugar ((for coating))
Instructions
- Preheat your oven to 375°F. Line a rimmed baking sheet with unbleached parchment paper and set it aside.
- In a large bowl, place the flour, xanthan gum, cornstarch, baking powder, salt, granulated sugar, and lemon zest. Whisk to combine well, breaking up any clumps of zest.
- Create a well in the center of the dry ingredients and add the butter, eggs, and lemon juice. Mix until all the ingredients are just combined. Be careful not to overmix.
- Scoop the dough into portions about 1.5 tablespoons each with a spring-loaded ice cream scoop or two spoons. Place about 2-inches apart on the prepared baking sheet. Using clean fingers, pat down any very rough dough around the edges (but not on top).
- Lift each mound of cookie dough gently and place into the confectioners’ sugar and toss to coat. Allow the dough to sit briefly, and then toss it in confectioners’ sugar again.
- Return the mounds to their positions on the baking sheet.
- For insurance, moisten the tops of the fully prepared mounds of dough, dust lightly with more confectioners’ sugar, and then brush off the excess with a pastry brush.
- Place the baking sheet in the center of the preheated oven. Reduce the oven temperature to 350°F right away.
- Bake until the cookies are puffed and mostly set in the center (about 12 minutes; don’t over bake). Remove from the oven and allow to cool completely on the baking sheet before serving.
Notes
- Ensure your gluten-free flour blend is appropriate for cookies. Brands like Better Batter or Cup4Cup work well.
- If your flour blend already contains xanthan gum, omit the additional 3/4 teaspoon.
- For Cup4Cup flour, replace the 1/4 cup cornstarch with an additional 1/4 cup Cup4Cup flour.
- Use fresh lemon zest and juice for the best flavor.
- Coating the dough twice in confectioners’ sugar is key for the classic crinkle appearance.
- Reducing the oven temperature to 350°F immediately after putting the cookies in helps prevent over-browning.
- Prep Time: 20 min
- Cook Time: 12 min
- Category: Main Course
- Method: Baked
- Cuisine: American
Nutrition
- Calories: 168 kcal
- Sugar: 11 g
- Sodium: 119 mg
- Fat: 8 g
- Carbohydrates: 31 g
- Fiber: 1 g
- Protein: 1 g
Ingredients and Substitutions
Using the right ingredients is key to perfect cookies. Here’s what you need and how you can adapt it.
Base Components
- Gluten-Free Flour Blend: Use a high-quality blend like Better Batter or Cup4Cup. Importantly, ensure your blend is meant for baking. For instance, some blends contain xanthan gum, so adjust accordingly.
- Xanthan Gum: This acts as a binder, replacing gluten. However, if your flour blend already includes it, you can omit the extra.
- Cornstarch: This helps create a tender crumb. Alternatively, if using Cup4Cup flour, replace the cornstarch with an equal amount of additional Cup4Cup flour.
- Baking Powder: This provides lift, ensuring the cookies puff up and crinkle beautifully.
- Salt: A touch of kosher salt enhances all the flavors.
- Sugar: Granulated sugar sweetens the dough, while confectioners’ sugar creates the iconic coating.
Wet Ingredients and Flavor
- Lemon Zest and Juice: Use fresh lemons for the brightest flavor. You’ll need at least one heaping tablespoon of zest and two generous tablespoons of juice.
- Butter: Unsalted butter at room temperature creams perfectly. As a result, it creates a soft dough.
- Eggs: Room temperature eggs blend seamlessly into the batter, providing structure.
How to Make Gluten Free Lemon Crinkle Cookies
Follow these simple steps for perfect cookies every time. In fact, the process is quick and rewarding.
Step 1: Prepare Your Oven and Pans
First, preheat your oven to 375°F. Meanwhile, line a rimmed baking sheet with unbleached parchment paper. This prevents sticking and ensures easy cleanup. Then, set the sheet aside.
Step 2: Combine the Dry Ingredients
Next, in a large bowl, place the gluten-free flour, xanthan gum (if using), cornstarch, baking powder, salt, granulated sugar, and lemon zest. Subsequently, whisk everything together thoroughly. Importantly, break up any clumps of lemon zest to distribute the flavor evenly.
Step 3: Mix the Dough
Now, create a well in the center of the dry ingredients. Then, add the softened butter, beaten eggs, and fresh lemon juice. After that, mix gently until all ingredients are just combined. Be careful not to overmix, as this can lead to tough cookies.
Step 4: Portion and Shape
Using a spring-loaded ice cream scoop or two spoons, scoop the dough into portions of about 1.5 tablespoons each. Place the mounds about 2 inches apart on the prepared baking sheet. Then, using clean fingers, gently pat down any very rough edges on the sides of each mound. However, avoid flattening the tops.
Step 5: The Double Sugar Coating
This step creates the signature look. First, lift each dough mound and place it in a bowl of confectioners’ sugar. Toss to coat completely. Then, allow the dough to sit for a brief moment. After that, toss each mound in the sugar again for a thick, snowy coating. Finally, return the coated mounds to their positions on the baking sheet.
Step 6: Final Touch and Baking
For an extra insurance of a white finish, you can lightly moisten the tops of the coated dough mounds. Then, dust lightly with more confectioners’ sugar and brush off the excess with a pastry brush.
Place the baking sheet in the center of the preheated oven and immediately reduce the oven temperature to 350°F. Bake for about 12 minutes, or until the cookies are puffed and mostly set in the center. Importantly, do not overbake. Finally, remove from the oven and allow the cookies to cool completely on the baking sheet before serving.
Pro Tips for Success
Follow these expert tips to ensure your cookies turn out perfectly.
- Room Temperature Ingredients: Always use room temperature butter and eggs. This allows for smooth mixing and a uniform dough.
- Measure Flour Correctly: Spoon your gluten-free flour blend into the measuring cup and level it off. Avoid scooping directly from the bag, as this can pack in too much flour.
- Don’t Overmix: Mix the dough just until the ingredients come together. Overmixing can develop starches and lead to dense cookies.
- Chill the Dough (Optional): If your dough seems too soft, you can chill it for 15-20 minutes before portioning. This makes handling easier.
- Watch the Oven: Ovens vary, so start checking at 10 minutes. The cookies should look set but still soft in the center.
Flavor Variations
While lemon is classic, you can easily adapt this recipe. For example, try orange zest and juice for a citrus twist. Alternatively, add a teaspoon of vanilla extract for a more nuanced flavor. You could also mix in a handful of dried cranberries or white chocolate chips.
If you love a different type of cookie, you might enjoy our recipe for chewy lemon crinkle cookies which offers a slightly different texture. For a traditional take, our classic lemon crinkle cookies are always a crowd-pleaser.
Serving Suggestions
These cookies are fantastic on their own with a glass of cold milk or a cup of tea. Furthermore, you can serve them as part of a dessert platter with fresh berries and whipped cream. They also make a lovely gift when packed in a pretty box or tin. Pair them with a savory dish like our hot honey feta chicken for a complete meal that ends on a sweet note.
Storage and Freezing Instructions
Store completely cooled cookies in an airtight container at room temperature for up to 4 days. For longer storage, you can freeze them. To freeze baked cookies, place them in a single layer on a baking sheet until solid, then transfer to a freezer bag. They will keep for up to 3 months. Thaw at room temperature.
You can also freeze the unbaked dough balls coated in confectioners’ sugar. Place them on a parchment-lined sheet, freeze solid, then bag. Bake from frozen, adding a minute or two to the baking time.
Nutrition Facts per Serving
| Calories | Fat | Carbs | Protein | Fiber | Sugar | Sodium |
|---|---|---|---|---|---|---|
| 168 kcal | 8 g | 31 g | 1 g | 1 g | 11 g | 119 mg |
FAQs About Gluten Free Lemon Crinkle Cookies
Can I use regular all-purpose flour?
Yes, you can. However, the measurements might need slight adjustment. Use 1 1/2 cups of regular all-purpose flour and omit the xanthan gum and cornstarch. The texture may be slightly different.
Why did my cookies not crinkle?
Several factors affect crinkling. First, ensure your baking powder is fresh. Secondly, do not flatten the dough mounds too much. The double coating of confectioners’ sugar is also crucial, as it creates a barrier that cracks as the cookie expands.
Can I make these cookies dairy-free?
Absolutely. Replace the butter with an equal amount of a solid dairy-free alternative, like vegan butter or refined coconut oil. Make sure it is at room temperature for best results.
How do I get a stronger lemon flavor?
For more intense lemon taste, increase the lemon zest to two tablespoons. You can also add a quarter teaspoon of lemon extract to the dough. Be cautious with adding more juice, as it can alter the dough’s consistency.
My dough is too sticky. What should I do?
Gluten-free dough can sometimes be sticky. If this happens, chill the dough for 20-30 minutes before portioning. You can also lightly wet your hands or dust them with gluten-free flour when shaping the mounds.
Final Thoughts
In conclusion, these Gluten Free Lemon Crinkle Cookies are a surefire hit. They are simple to make, bursting with flavor, and have that perfect crinkle texture. Whether you need a gluten-free treat or just love lemon, this recipe delivers. So, gather your ingredients and preheat your oven. You’re just about an hour away from enjoying these delightful cookies. Happy baking!