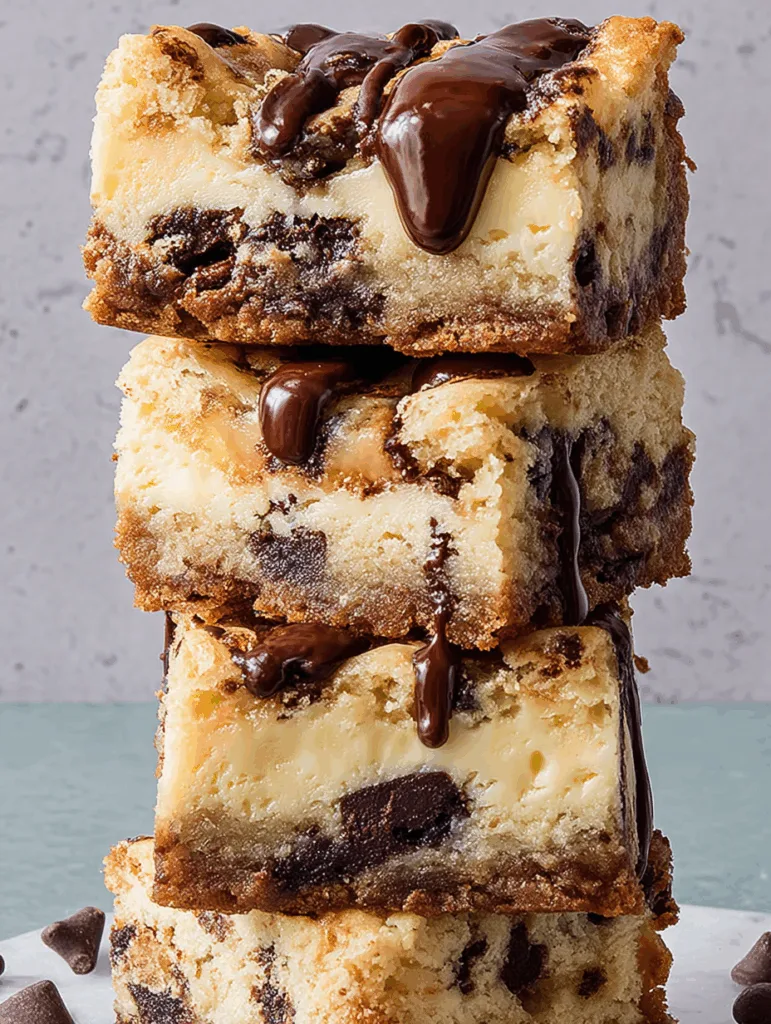
These Cookie Dough Cheesecake Bars are a rich, crowd-pleasing treat that layers soft chocolate chip cookie dough with a creamy cheesecake center. It’s one of those desserts that feels like a bakery masterpiece but made right in your own kitchen.
Why Cookie Dough Cheesecake Bars Are a Dream Dessert
Double the comfort, double the joy
You don’t need a special occasion to bring out a dessert that feels like a warm hug. These Cookie Dough Cheesecake Bars combine two favorites chewy cookie dough and silky cheesecake in every slice. Whether you’re hosting a family movie night or prepping a make-ahead treat for guests, this bar dessert brings both fun and flavor to the table.
Let’s break down what makes these bars so satisfying:
- The base is golden and slightly chewy, just like a perfect chocolate chip cookie.
- The center bakes into a soft, tangy cheesecake layer that melts in your mouth.
- The top is dotted with cookie dough crumbles and finished with a light drizzle of melted chocolate.
- Easy to portion and store, these bars are freezer-friendly and travel well.
And the best part? The ingredients are all pantry-friendly, using simple swaps where needed to make them suitable for everyone.
For even more inspiration on this type of layered dessert, you’ll love the twist in our Butterfinger Caramel Cheesecake Bars that mix nutty crunch with velvety texture.
Recipe
Print
Cookie Dough Cheesecake Bars
- Total Time: 6 hrs
- Yield: 15–18 bars 1x
Description
Cookie Dough Cheesecake Bars combine soft cookie dough with a creamy cheesecake layer for a rich, bakehouse-style dessert that’s easy to make at home.
Ingredients
- 3/4 cup unsalted butter, softened (170 g)
- 1 1/2 cups all-purpose flour (180 g)
- 1 tsp kosher salt
- 1/2 tsp baking soda
- 1/2 cup packed dark brown sugar (110 g)
- 1/2 cup granulated sugar (100 g)
- 1 large egg
- 1 1/2 tsp pure vanilla extract
- 8 oz semisweet chocolate chips (226 g)
- Filling:
- 2 (8-oz) packages cream cheese, softened (452 g)
- 3/4 cup granulated sugar (150 g)
- 2 tbsp all-purpose flour
- 1/3 cup sour cream (80 ml)
- 3 large eggs
- 1 tsp pure vanilla extract
- 1/4 tsp kosher salt
- 2 oz semisweet chocolate chips (56 g)
Instructions
- Arrange a rack in the center of oven and preheat to 350°F (175°C). Grease a 13″x9″ pan and line with parchment, leaving 2-inch overhang.
- In a bowl, whisk flour, salt, and baking soda.
- In another bowl, beat butter, brown sugar, and granulated sugar until fluffy. Add egg and vanilla. Mix in dry ingredients, then fold in chocolate chips.
- Press two-thirds of dough into pan. Refrigerate the rest. Bake for 12–15 minutes until puffed but slightly underbaked.
- While crust bakes, beat cream cheese, sugar, flour, and sour cream until smooth. Add eggs, vanilla, and salt. Pour over crust and smooth top.
- Bake cheesecake for 20–25 minutes until edges are set and center is jiggly.
- Crumble remaining dough over cheesecake. Bake for another 15–20 minutes until topping is golden and center is set.
- Cool completely. Cover and refrigerate for at least 4 hours or overnight.
- Melt remaining chocolate chips over simmering water until smooth.
- Lift bars using parchment, drizzle with melted chocolate, chill 15 minutes, then slice and serve.
Notes
- Use full-fat cream cheese for best texture.
- Don’t overbake the cheesecake layer—it should still jiggle when pulled from the oven.
- Use an offset spatula to smooth the top layer evenly.
- Prep Time: 25 mins
- Cook Time: 50 mins
- Category: Dessert
- Method: Baking
- Cuisine: American
Nutrition
- Serving Size: 1 bar
- Calories: 375
- Sugar: 29 g
- Sodium: 227 mg
- Fat: 23 g
- Saturated Fat: 13 g
- Unsaturated Fat: 9 g
- Trans Fat: 0 g
- Carbohydrates: 39 g
- Fiber: 1 g
- Protein: 5 g
- Cholesterol: 90 mg
Getting That Gooey Center Just Right
Bake timing secrets for perfect layers
It’s easy to think the longer you bake, the firmer the result but when it comes to these Cookie Dough Cheesecake Bars, timing is everything. You want a dessert that slices clean but still delivers that soft, slightly gooey center that makes every bite satisfying.
The trick lies in staggered baking. First, bake the cookie crust by itself for 12 to 15 minutes. It’ll look a bit puffed and slightly underdone and that’s exactly what you want. This gives the crust structure but allows it to meld perfectly with the cheesecake.
Next, pour in your cheesecake filling and bake just until the edges are set and the center still has a little jiggle. That slight wobble means the inside will turn out creamy, not dry.
Once you crumble the cookie dough on top and return it to the oven, you’re creating that golden finish with just enough bite to contrast the silky center.
Keep a close eye during the final minutes. If you notice the top getting too brown, you can tent it loosely with foil. The goal is a tender top not crispy or overbaked.
Avoiding cracks and dry cheesecake
The cheesecake layer in this recipe doesn’t require a water bath, but there are still a few tips to help avoid cracks and dryness:
- Let your ingredients (especially cream cheese and eggs) come to room temperature. This helps them blend smoothly without overmixing.
- Don’t whip the batter too much this adds excess air and leads to puffing, then collapsing.
- Once the bars are done baking, let them cool gradually before chilling. A sudden drop in temperature can cause the top to crack.
- Chill for at least 4 hours before slicing. This helps the cheesecake set fully and makes clean cuts easier.
For a no-bake version of this concept, check out our No-Bake Twix Cheesecake Recipe, which uses similar layering but skips the oven entirely ideal for summer days.
These steps may seem small, but together they create a dessert that looks as good as it tastes. Each bar should hold its shape but feel melt-in-your-mouth soft inside.
Smart Ingredient Swaps & Storage Tips
Easy swaps that keep the flavor rich
One of the reasons these Cookie Dough Cheesecake Bars are so popular is their flexibility. You can easily make small ingredient adjustments without losing texture or taste. Whether you’re baking for dietary preferences or just working with what’s in the pantry, these swaps will have you covered.
Here are a few smart substitutions:
- Butter: Choose a plant-based stick-style butter that matches the fat content of traditional butter. It gives the same structure and richness.
- Sour cream: If you’re out of sour cream, use plain, unsweetened Greek-style yogurt. It brings the same tang and creaminess to the cheesecake filling.
- Semisweet chocolate chips: You can swap these with dark chocolate chunks or mini chips to adjust sweetness and texture.
- All-purpose flour: For a slightly nutty finish, try replacing ¼ of the flour with almond flour.
Stick to full-fat cream cheese to keep the filling velvety and prevent it from turning watery. Reduced-fat versions may alter the final consistency.
Want to try another bar dessert with creamy texture and nutty flavor? These No-Bake Pistachio Cheesecake Bars bring that soft crunch and creamy base together beautifully.
How to store, freeze, and make ahead
These Cookie Dough Cheesecake Bars aren’t just delicious they’re also perfect for planning ahead. Here’s how to keep them fresh and fuss-free:
- Chill before serving: After baking, allow bars to cool at room temperature, then refrigerate for at least 4 hours. Overnight works best for clean slicing and deeper flavor.
- Refrigerator: Store leftovers in an airtight container in the fridge for up to 5 days.
- Freezer-friendly: Wrap individual bars in parchment or wax paper, then place them in a freezer-safe container or bag. They’ll stay fresh for up to 2 months.
- To serve from frozen: Thaw in the fridge for a few hours, or on the counter for about 30 minutes.
For parties or events, you can bake and chill these bars the night before, then drizzle with chocolate just before serving. This keeps the drizzle shiny and soft, rather than cracking.
These tips not only save time but make this recipe ideal for gifting, entertaining, or simple weeknight cravings.
Serving Ideas & Family-Friendly Twists
Fun ways to serve Cookie Dough Cheesecake Bars
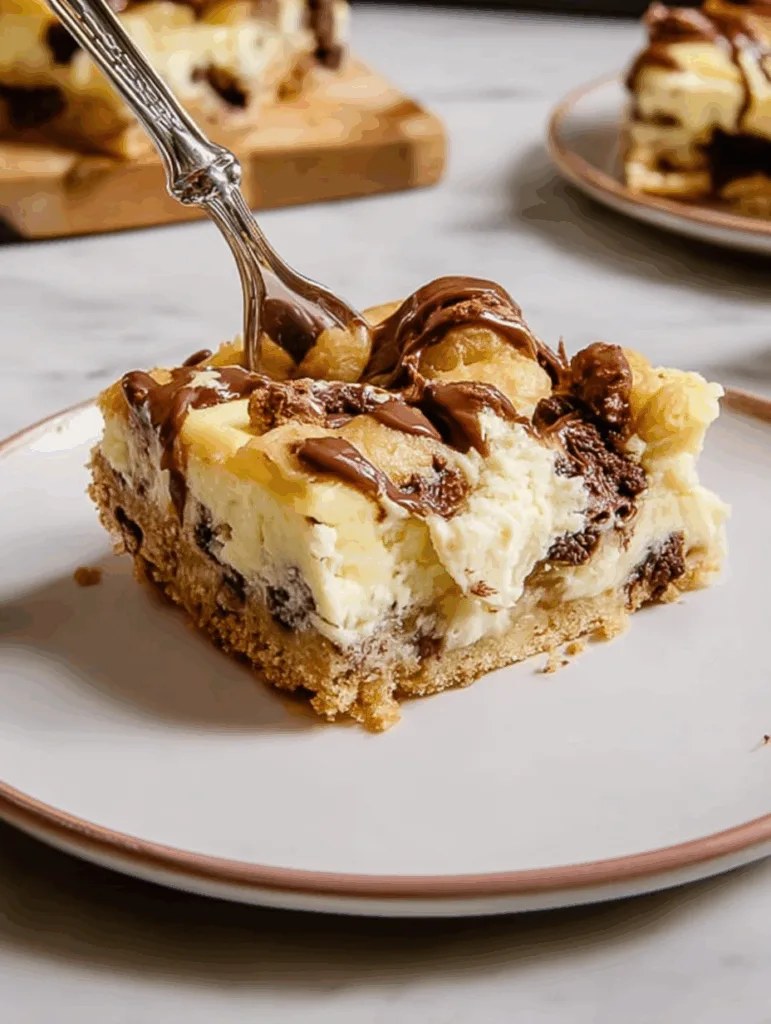
Once chilled and sliced, these bars are ready to impress but there are plenty of ways to make your presentation feel extra special. Whether you’re plating for a family dinner or packing them up for a picnic, here’s how to add that finishing touch.
Try these easy serving ideas:
- Drizzle with extra melted chocolate before serving to give the top a glossy, eye-catching finish.
- Dust lightly with powdered sugar for a simple, elegant contrast against the cookie topping.
- Add a scoop of vanilla bean ice cream on the side when serving warm slices.
- Serve mini squares on a platter with toothpicks for bite-sized party treats.
If you’re slicing for a crowd, use a warm, damp knife to make clean, bakery-style edges—wipe between each cut for the neatest look.
These bars also pair well with espresso-based drinks. For a cozy drink to serve alongside, you might love the creamy balance of our Mini Banana Pudding Cheesecake for a softer, spoonable version of this classic combo.
Why families love this dessert
There’s something about Cookie Dough Cheesecake Bars that brings everyone to the kitchen. They check all the boxes: easy to make, rich in flavor, and fun to eat.
- Kids love the cookie top especially when it’s still slightly warm and gooey.
- Adults enjoy the balance between the dense cheesecake layer and the soft-baked dough.
- Home bakers appreciate the simplicity of one-pan baking and ingredients that come together fast.
- Busy families benefit from the make-ahead format, saving time without sacrificing taste.
It’s the kind of recipe that becomes part of your dessert rotation, not just a one-time treat. Plus, the batch makes 15 to 18 servings, making it ideal for holidays, potlucks, and birthdays.
Whether you’re new to baking or a seasoned home chef, these bars deliver reliable results and sweet smiles every time.
Final Thoughts
Cookie Dough Cheesecake Bars bring together the soft, nostalgic charm of cookie dough with the creamy luxury of cheesecake. They’re simple to make, easy to store, and flexible enough to customize. Whether you’re baking ahead for the weekend or serving fresh from the fridge, this recipe fits effortlessly into any dessert lineup.
With a few smart swaps and careful baking, you’ll have a pan of treats that look as good as they taste no need to visit a bakery. Just tuck in and enjoy every bite.