Imagine sitting around a campfire enjoying the gooey deliciousness of s’mores – now picture that same irresistible flavor in convenient bar form.
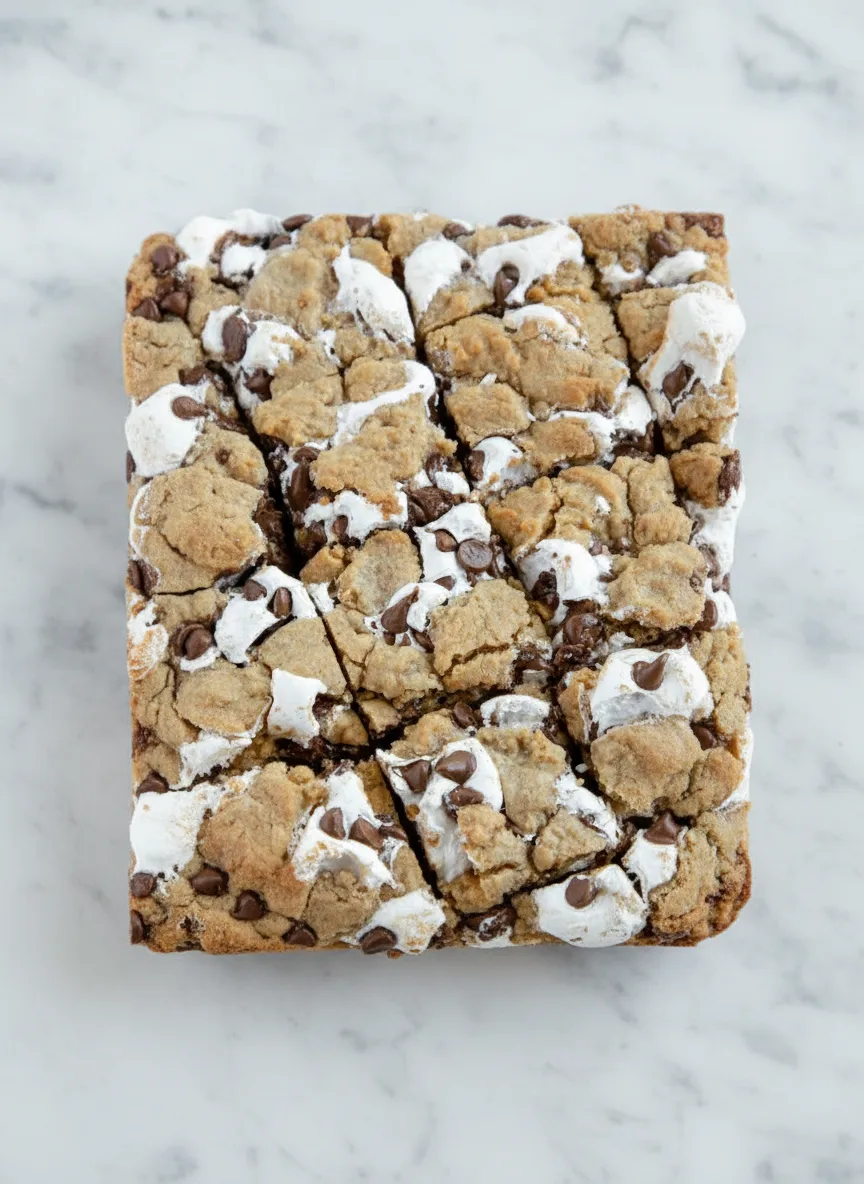
Our s’mores bars recipe brings all the nostalgic joy of traditional s’mores without needing an open flame. These layered treats combine crunchy graham cracker cookie dough, melty milk chocolate, and fluffy marshmallow cream into perfect handheld desserts that’ll become your new favorite sweet treat.

Why You’ll Love This S’mores Bars Recipe
Perfect For Any Occasion
These bars shine at every gathering from summer barbecues to holiday cookie exchanges. Their simple preparation and crowd-pleasing flavor make them ideal for bake sales, potlucks, or school events. For a festive twist, you could even add red and green sprinkles during the holiday season!
No Special Equipment Needed
Skip the campfire tools and work with standard kitchen equipment instead. All you need are basic baking tools and a 9×13 pan to create these delicious bars. The convenient treat travels well and stays fresh for several days when stored properly.
Family-Friendly Treat
Kids adore helping with the easy layering process – smashing dough pieces over the marshmallow layer brings giggles every time. Plus, since this recipe contains no nuts, you can confidently share it at allergy-sensitive gatherings.
Recipe
Print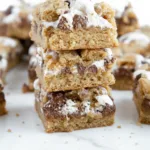
S’mores Bars
- Total Time: 45 minutes
- Yield: 24 servings 1x
Description
Delicious graham cracker cookie bars layered with marshmallow fluff and milk chocolate chips
Ingredients
- 1 cup unsalted butter (226 g), room temperature
- 1 ½ cups light brown sugar (330 g)
- 2 large eggs (100 g), room temperature
- 2 tsp vanilla extract (10 mL)
- 2 cups all-purpose flour (240 g)
- 2 cups graham cracker crumbs (200 g)
- 1 tsp baking soda (6 g)
- ½ tsp salt (3 g)
- 3 cups marshmallow fluff (840 g)
- 12 oz milk chocolate chips (340 g)
Instructions
- Preheat oven to 350°F (177°C). Prepare 9×13 baking pan with nonstick cooking spray and parchment paper.
- In large mixing bowl, cream together butter and brown sugar until light and fluffy. Add eggs and vanilla extract, mixing until smooth.
- In separate bowl, whisk together flour, graham cracker crumbs, baking soda and salt.
- Add flour mixture to butter mixture, mixing on low until soft dough forms.
- Spread ⅔ of dough into even layer in prepared pan.
- Spread marshmallow fluff over dough layer, then sprinkle with chocolate chips.
- Crumble remaining dough over chocolate chip layer.
- Bake approximately 30 minutes until golden brown.
- Cool completely in pan before removing and cutting into squares.
Notes
- Use room temperature ingredients for best texture
- Bars cut cleanest when completely cooled
- Store leftovers in airtight container at room temperature
- Prep Time: 15 min
- Cook Time: 30 min
- Category: Main Course
- Method: Baked
- Cuisine: American
Ingredients and Substitutions
Base Components
- Butter: Use unsalted for better flavor control
- Brown sugar: Light brown sugar provides ideal moisture
- Eggs: Room temperature for better incorporation
Crumb Crust Elements
- Graham cracker crumbs: Crush whole crackers or use pre-crumbled
- All-purpose flour: Provides structure to the dough
- Leavening agents: Baking soda creates perfect lift
Sweet Fillings
- Marshmallow fluff: Spreads easily without melting
- Milk chocolate chips: Provides authentic s’mores flavor
How to Make S’mores Bars
Step 1: Prepare Your Pan and Oven
Always begin by preheating your oven to 350°F (177°C). Spray a 9×13-inch baking pan with nonstick cooking spray and line with parchment paper. Leave paper overhanging on two sides for easy removal later. This simple preparation prevents sticking and ensures clean cuts.
Step 2: Make the Graham Cracker Dough
Cream together butter and brown sugar until pale and fluffy – about 3 minutes on medium speed. Add eggs one at a time, mixing well after each. Stir in vanilla extract until fully incorporated. In a separate bowl, whisk together flour, graham cracker crumbs, baking soda, and salt. Gradually mix dry ingredients into wet ingredients until a soft dough forms.
Step 3: Layer Your Components
Press about two-thirds of the dough into your prepared pan using lightly greased hands. Spread marshmallow fluff evenly over the base layer. Sprinkle chocolate chips across the marshmallow. Crumble remaining dough over the top – don’t worry about covering completely as the marshmallow should peek through.
Step 4: Bake and Cool Properly
Bake 25-30 minutes until golden brown. Resist overbaking – the center might look slightly underdone but will set as it cools. Let bars cool completely in pan before lifting out and cutting into squares. For cleaner slices, refrigerate for 30 minutes first if needed.
Pro Tips for Success
Temperature Matters
Always use room temperature butter and eggs for proper creaming. Cold ingredients don’t incorporate as well, leading to dense bars. Remove dairy items 1-2 hours before baking for best texture.
Bar Cutting Techniques
Use a sharp chef’s knife and wipe it clean between cuts for neat squares. For sticky situations, dip your knife in hot water and dry thoroughly before each slice. If serving later, you can cut individual bars as needed from the chilled pan.
Marshmallow Handling Tricks
Spray measuring cups with cooking spray before scooping marshmallow fluff to prevent sticking. Use an offset spatula dipped in warm water to smooth the fluff layer without tears or uneven spots.

Flavor Variations
Chocolate Options
Substitute semisweet or dark chocolate chips for deeper flavor. Chopped chocolate bars melt better than chips if you prefer gooier texture. You could also layer peanut butter chips with the chocolate for a sweet-salty twist.
Crust Enhancements
Add 1/2 teaspoon cinnamon to the dough for warm spice notes. Crushed pretzels mixed with graham crumbs bring satisfying salty crunch. For nut-free options, try using crushed gluten-free graham crackers.
Marshmallow Alternatives
Mini marshmallows work instead of fluff if you prefer chew over creaminess. Toast them briefly under the broiler after baking for dramatic effect. Fluff alternatives like vegan marshmallow spread accommodate dietary preferences.
Serving Suggestions
Serve these bars slightly warmed with a scoop of vanilla ice cream for decadent dessert perfection. Pair with fresh berries or citrus slices to cut the sweetness. For an elegant presentation, dust bars with cocoa powder or powdered sugar before serving.
These s’mores bars make an excellent addition to cookie platters alongside classics like chocolate chip cookies. For a lighter pairing, consider offering them with our refreshing winter salad with pomegranate at holiday gatherings.
Storage and Freezing Instructions
Room Temperature Storage
Store bars in an airtight container at room temperature for up to 3 days. Place parchment between layers to prevent sticking. High humidity may cause marshmallow layer to soften – in these conditions, refrigeration works best.
Refrigeration Method
Refrigerate bars up to 1 week in sealed containers. Cold marshmallow becomes firm – let bars sit at room temperature 15 minutes before serving to restore texture. Well-wrapped individual bars travel well in lunchboxes when chilled.
Freezing Guidelines
Freeze uncut bars wrapped tightly in plastic wrap and foil for up to 3 months. Thaw overnight in refrigerator before cutting and serving. Alternatively, freeze pre-cut portions for quick single servings using reusable containers.
Nutrition Facts per Serving
| Calories | Fat | Carbs | Protein | Fiber | Sugar | Sodium |
|---|---|---|---|---|---|---|
FAQs About S’mores Bars
Can I use homemade marshmallow fluff?
Absolutely! Fresh homemade marshmallow fluff adds wonderful flavor. Just ensure it’s thick enough to hold its shape when layered. Homemade versions may brown more quickly in the oven though.
Why do my bars fall apart when cutting?
The most common mistake is cutting too soon. Let bars cool completely – at least 2 hours after baking – for clean slices. Chilling briefly helps firm up the layers for perfect squares every time.
How can I make these ahead for a party?
Prepare dough up to 3 days ahead and refrigerate tightly wrapped. Assemble bars just before baking for best texture. Alternatively, bake and freeze fully cooled bars up to 1 month in advance for easy entertaining.
Can I double this recipe?
Yes, use two 9×13 pans for best results rather than one larger pan. Doubling batter in a single pan may lead to uneven baking. Consider halving the marshmallow layer slightly if doubling to prevent overflow.
What’s the best chocolate for s’mores bars?
High-quality milk chocolate chips melt perfectly while holding shape. However, our lemony citrus pasta dish contrasts beautifully with the rich chocolate if you’re pairing flavors.
Final Thoughts
These incredible s’mores bars capture campfire magic in every bite while eliminating the mess of traditional s’mores.
The chewy graham cracker cookie base provides perfect texture contrast to the creamy marshmallow and rich chocolate layers. For those needing nut-free desserts that satisfy all ages, these bars deliver without compromising on flavor.
Whether you’re preparing for school parties or holiday cookie tins, this versatile recipe adapts to numerous occasions.
Feel free to experiment with different chocolate varieties or mix-ins to create your signature version. If you enjoy global flavors, our popular Thai-inspired wraps offer savory contrast to these sweet treats.
Remember to store leftovers properly and consider making a double batch – these disappear quickly once tasted. Most importantly, enjoy sharing these homemade goodies with friends and family. Happy baking!