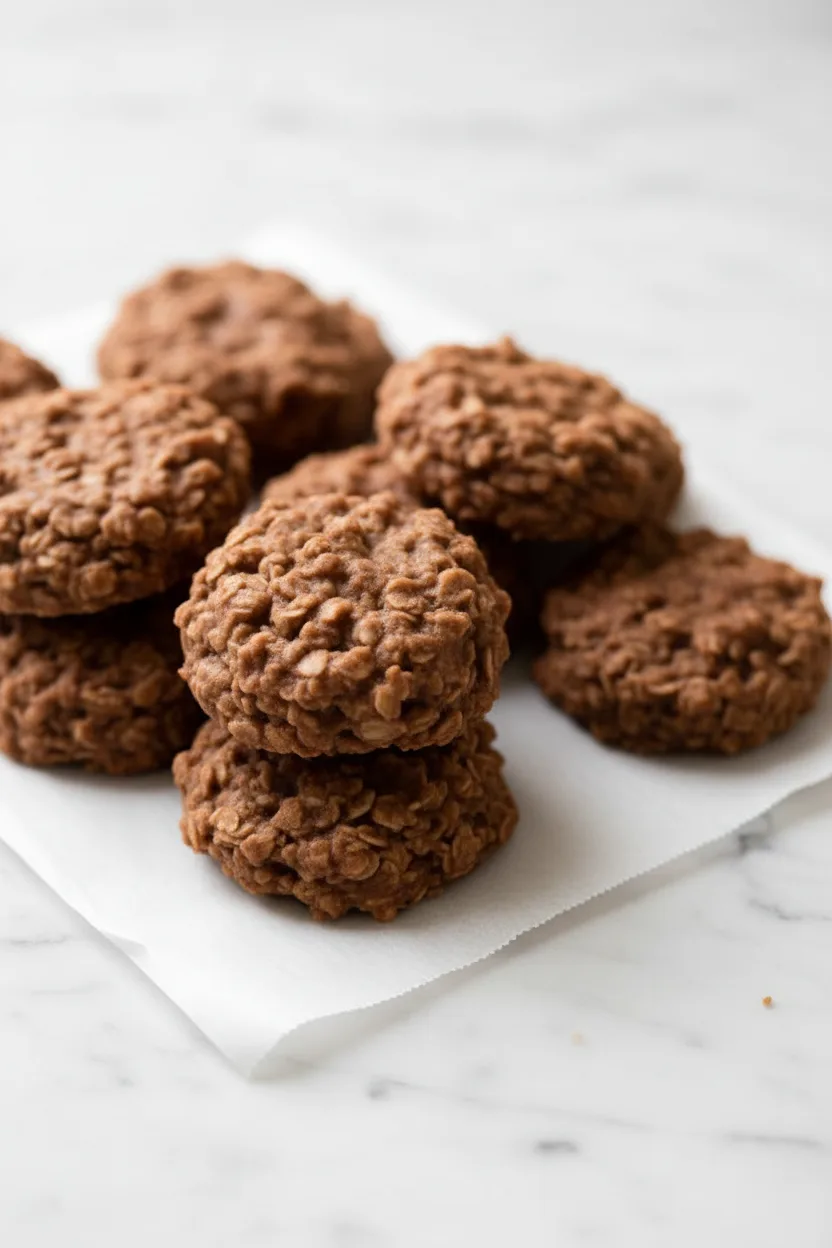
Imagine whipping up delicious chocolate cookies without ever turning on your oven. These Easy 10 Minute Chocolate No Bake Cookies deliver rich flavor and chewy texture with minimal effort.
Perfect for busy families, last-minute treats, or satisfying sudden chocolate cravings, this recipe has stood the test of time because it works every single time.
Join thousands of home cooks who rely on this fuss-free method to create crowd-pleasing sweets in record time.
Why You’ll Love This Recipe
You’ll adore these chocolate no bake cookies for several compelling reasons. First, they require just seven simple ingredients you likely already have in your pantry. Next, the whole process takes under half an hour with most of that time being hands-off cooling.
These cookies also travel well for school events, picnics, or office snacks. Moreover, you don’t need any fancy equipment or baking skills to achieve perfect results.
Perfect for Beginners
If you’re new to cooking or working with kids in the kitchen, this recipe offers foolproof success. You’ll master the boiling technique quickly and enjoy immediate delicious rewards without complex steps.
Allergy-Friendly Options
While this version uses peanut butter, we’ll explore easy substitutions later for those with nut allergies. The recipe also naturally contains no eggs or flour, making it adaptable for various dietary needs.
Recipe
Print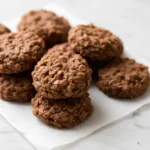
Easy 10 Minute Chocolate No Bake Cookies
- Total Time: 45 min
- Yield: 30 servings 1x
Description
Quick and easy chocolate no bake cookies with peanut butter and oats ready in under 30 minutes
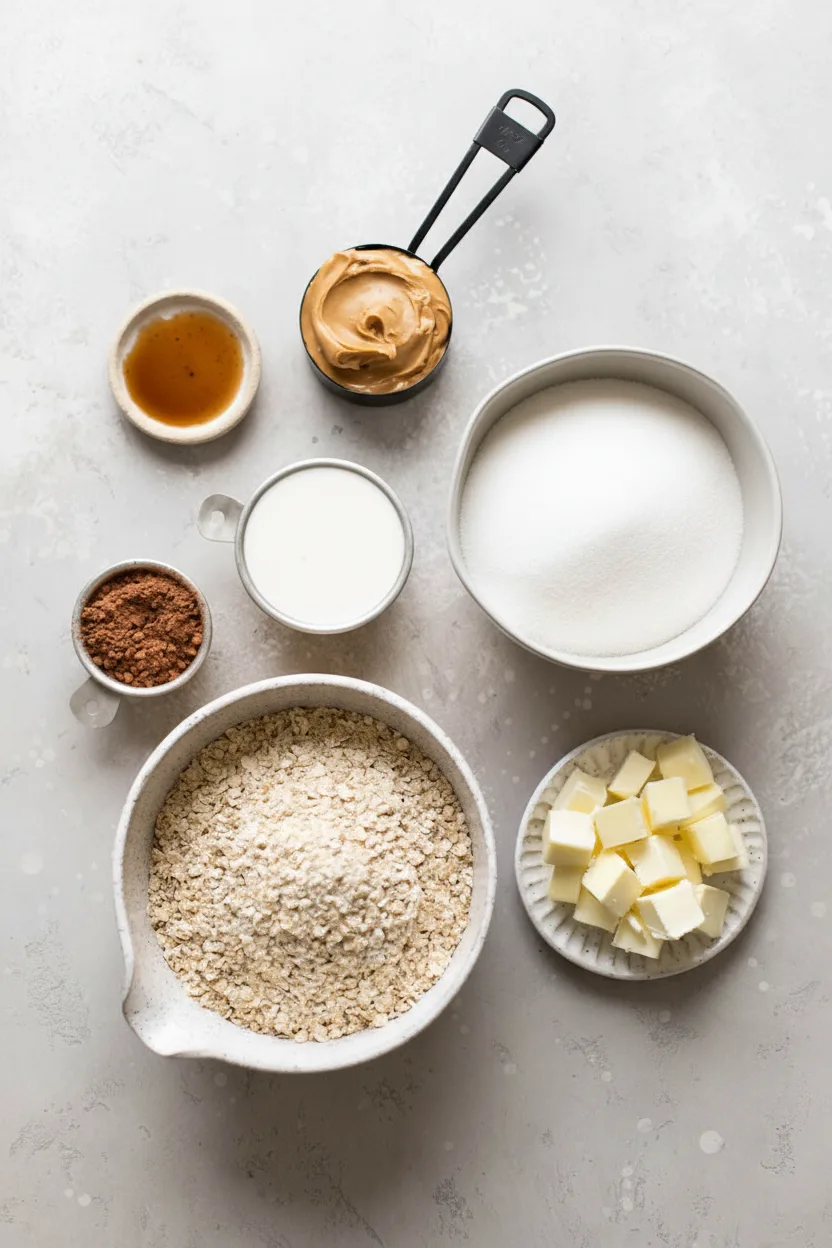
Ingredients
- 1/2 cup (115 g) butter (sliced into pieces)
- 2 cups (400 g) granulated sugar
- 1/2 cup (120 ml) milk
- 1/4 cup (20 g) unsweetened cocoa powder
- 1/2 cup (125 g) creamy peanut butter
- 1 teaspoon pure vanilla extract
- 3 cups (300 g) quick-cooking oats
Instructions
- Before getting started, make sure to gather all of your ingredients and measure everything out. Line two large baking sheets with parchment paper and set aside.
- Combine the butter, sugar, milk, and unsweetened cocoa powder in a large saucepan and heat over medium heat, making sure to stir often until the butter is melted and everything is well combined. Bring the mixture to a rolling boil and allow to boil for 60 seconds (make sure to set a timer!) stirring occasionally.
- Remove from the heat, and stir in the peanut butter and vanilla extract until fully combined.
- Stir in the oats and mix until all of the oats are coated with the mixture and everything is well combined.
- Drop spoonfuls of the mixture onto the prepared baking sheets (I like to use a 1.5 tablespoon cookie scoop). Allow to cool for 20 to 30 minutes, serve, and enjoy!
Notes
- Store cooled cookies in airtight container at room temperature for up to 1 week
- Freeze undropped mixture for up to 3 months
- For nut-free version substitute sunflower seed butter
- Prep Time: 20 min
- Cook Time: 5 min
- Category: Main Course
- Method: Baked
- Cuisine: American
Ingredients and Substitutions
Let’s break down each component of these irresistible cookies and explore smart swaps for different preferences or pantry situations. Understanding your ingredients helps troubleshoot any issues and ensures consistent results.
Base Components
- Butter: Provides richness and helps the mixture solidify. For dairy-free version, use coconut oil or plant-based butter
- Sugar: Granulated white sugar gives structure and sweetness. Reduce by 1/4 cup if you prefer less sugary treats
- Milk: Whole milk creates creamier texture but any percentage works. Use almond milk or oat milk for dairy-free needs
- Quick oats: Essential for the signature texture. Don’t substitute steel-cut or old-fashioned oats as they won’t soften properly
Flavor Boosters
- Cocoa powder: Use unsweetened variety for balanced chocolate flavor. Dark cocoa powder intensifies the taste beautifully
- Peanut butter: Creamy style blends best. If avoiding nuts, try sunflower seed butter instead
- Vanilla extract: Pure variety offers best flavor. For variation, try almond extract (use half the amount)
How to Make No Bake Cookies
Follow these straightforward steps to create perfect chocolate no bake cookies every time. Remember that timing matters most during the boiling stage – keep your timer handy!
Step 1: Prepare Your Workspace
Gather all ingredients before starting. Line two baking sheets with parchment paper or silicone mats. This prevents sticking and makes cleanup effortless. Measure everything precisely – baking success depends on accurate proportions.
Step 2: Create the Chocolate Base
Combine butter, sugar, milk, and cocoa powder in a large saucepan. The large size prevents boil-overs. Heat over medium heat while stirring frequently until butter melts completely and mixture becomes smooth. Attach a candy thermometer if you have one – you want the mixture to reach 220°F (104°C).
Step 3: The Crucial Boil
Bring mixture to a full rolling boil where bubbles cover the entire surface. Start your timer immediately for 60 seconds, stirring occasionally to prevent scorching. This exact boiling time ensures proper sugar crystallization so cookies set correctly.
Step 4: Incorporate Remaining Ingredients
Remove pan from heat. Promptly stir in peanut butter and vanilla extract until fully melted and combined. Then add oats all at once, stirring vigorously until every oat gets thoroughly coated with chocolate mixture.
Step 5: Form and Cool Cookies
Working quickly but carefully, drop tablespoon-sized portions onto prepared sheets using a cookie scoop or two spoons. Allow cookies to cool at room temperature for 20-30 minutes until firm. Resist touching them during this setting period.
Pro Tips for Success
Master these professional techniques to elevate your no bake cookies from good to extraordinary. These insights solve common problems and ensure perfect batches consistently.
Timing is Everything
Over-boiling makes crumbly cookies while under-boiling causes sticky messes. Use a timer religiously during the boiling phase. If your stove runs hot, reduce heat slightly once boiling starts to maintain control.
Texture Troubleshooting
If cookies won’t set after cooling, the mixture likely didn’t reach proper temperature. Place entire baking sheets in refrigerator for 15 minutes to rescue them. If cookies become too hard, briefly microwave at 50% power in 5-second intervals.
Portion Control Perfection
Use a small cookie scoop (1-1.5 tablespoon size) for uniform treats that cool evenly. If mixture hardens while scooping, return saucepan to low heat for 15 seconds while stirring.

Flavor Variations
While the classic chocolate peanut butter combination shines, experiment with these delicious twists to keep things exciting. Each variation maintains the same easy method with minor ingredient swaps.
Mocha Madness
Add 1 teaspoon instant espresso powder with the cocoa for sophisticated coffee depth. This version pairs wonderfully with afternoon coffee breaks or as dessert after hearty meals.
Tropical Twist
Replace peanut butter with coconut butter and add 1/4 cup shredded coconut with the oats. Top cooled cookies with toasted coconut flakes. For more tropical inspiration, try complementing your cookies with a refreshing Pina Colada smoothie bowl.
Nut-Free Delight
Use sunflower seed butter instead of peanut butter and add 2 tablespoons chia seeds for nutrition boost. This creates school-safe treats that still satisfy those craving nutty flavors.
Serving Suggestions
While delicious alone, these versatile cookies pair beautifully with various accompaniments. Consider these presentation and pairing ideas to elevate your treat experience.
Plating Perfection
Arrange cookies on a vintage cake stand for rustic charm or line them in mini cupcake liners for parties. Drizzle melted white chocolate over cooled cookies for decorative flair.
Beverage Pairings
Cold milk remains the classic pairing, but try dunking cookies in hot cocoa for double chocolate bliss. Adults might enjoy them with bold coffee or dessert wines.
Meal Combinations
Include these cookies in lunchboxes alongside savory mains. They make perfect endings to bright quinoa breakfast bowls or hearty Mediterranean chicken bowls for balanced nutrition and indulgence.
Storage and Freezing Instructions
Proper storage maintains freshness and texture for your chocolate no bake cookies. Follow these guidelines to enjoy them days or even weeks after preparation.
Room Temperature Storage
Keep cooled cookies in airtight containers with parchment between layers. Store in cool, dark place for up to 1 week. Avoid refrigerating as humidity makes them sticky.
Freezing for Future Enjoyment
Freeze cookies in single layers on baking sheets until firm (about 1 hour), then transfer to freezer bags. They keep beautifully for 3 months. Thaw at room temperature for 15 minutes before serving.
FAQs About No Bake Cookies
Let’s address common questions home cooks have about perfecting these easy chocolate treats.
Why won’t my cookies set properly?
The most likely culprit is insufficient boiling time, humidity, or inaccurate measurements. If cookies don’t harden after 45 minutes, refrigerate them for 20 minutes to kickstart setting.
Can I freeze the cookie mixture before scooping?
Yes! Portion uncooked mixture onto baking sheets, freeze until solid, then transfer to containers. Thaw slightly before eating or bake at 350°F for 10 minutes for crispy edges.
How do I make these cookies vegan?
Substitute plant-based butter, almond milk, and ensure your chocolate is dairy-free. For egg-free binding, the recipe already contains none.
What’s the secret to smooth texture?
Stir constantly while heating to prevent sugar crystals from forming. If you see graininess, add 1 tablespoon hot water and stir vigorously to dissolve sugar.
Final Thoughts
These Easy 10 Minute Chocolate No Bake Cookies deliver maximum satisfaction with minimal effort.
Whether you need last-minute treats for unexpected guests or a quick project with kids in the kitchen, this recipe proves delicious doesn’t require complexity. Keep pantry staples stocked and you’ll always be moments away from chocolate bliss.
Experiment with variations to find your family’s favorite version, and don’t forget to share the love – these treats make wonderful edible gifts too!