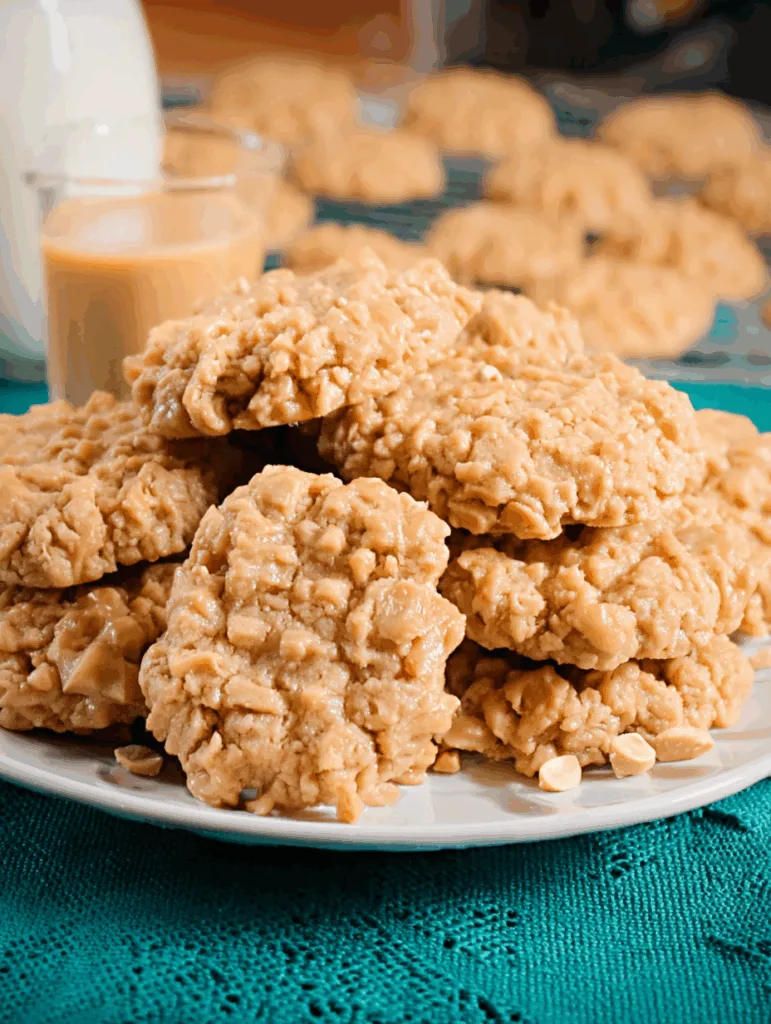
These peanut butter no-bake cookies are chewy, sweet, and perfect when you need something homemade without the hassle. Ready in just minutes, this old-school treat delivers everything you want without turning on the oven.
Why Peanut Butter No-Bake Cookies Are a Must-Make
Perfect for Busy Sweet Cravings
Let’s be real, sometimes you just need something sweet, fast. That’s where peanut butter no-bake cookies come in. No oven? No problem. All you need is a saucepan, a spoon, and six simple ingredients. In less than 10 minutes, you’ll have a batch of cozy, chewy cookies cooling on your counter. They’re the kind of treat that’s perfect when your sweet tooth strikes but you don’t want to spend hours baking.
- No oven required
- Quick prep and cleanup
- Great for last-minute cravings
This recipe shines during summer when it’s too warm to bake or when you just want to whip up something sweet without making a mess.
Nostalgic & Family-Approved
There’s something timeless about peanut butter no-bake cookies. Maybe it’s because they remind us of school lunches or grandma’s kitchen. That rich peanut butter flavor and the hearty texture from quick oats make them a hit with both adults and kids. It’s one of those treats that feels homemade in the best way, warm, cozy, and nostalgic.
They also make a great alternative to baked desserts like the No Bake Cannoli Delight when you want something chewy but quick. Whether you serve them at potlucks, pack them in lunchboxes, or save a few for your late-night cravings, they’re guaranteed to please.
Recipe
Print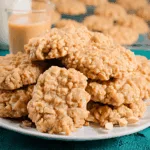
Classic Peanut Butter No-Bake Cookies
- Total Time: 45 minutes
- Yield: 24 cookies 1x
- Diet: Vegetarian
Description
These peanut butter no-bake cookies are quick, chewy, and rich. Perfect for when you’re craving something sweet without turning on the oven.
Ingredients
- 2 cups granulated sugar (400 g)
- ½ cup plant-based butter (115 g)
- ½ cup whole milk (120 ml)
- 3 cups 1-minute oats (240 g)
- ¾ cup creamy peanut butter (180 g)
- 1 tablespoon vanilla extract (15 ml)
Instructions
- Place wax paper on two baking sheets and set aside
- Combine sugar, plant-based butter, and milk in a large saucepan over medium heat, stirring frequently until butter melts
- Once it starts bubbling in the center, let it boil for 60 seconds exactly
- Remove from heat and stir in oats, peanut butter, and vanilla until fully combined
- Quickly drop spoonfuls onto wax paper
- Let cool for 30 minutes until set
Notes
- Creamy or crunchy peanut butter works great
- Stick to 60 seconds for boiling—no more, no less
- Use quick oats for the right texture; old-fashioned oats will be too firm
- Store in an airtight container for up to one week
- Yields around 24–26 cookies
- Prep Time: 5 minutes
- Cook Time: 10 minutes
- Category: Dessert
- Method: No-Bake
- Cuisine: American
Nutrition
- Serving Size: 1 cookie
- Calories: 188
- Sugar: 18g
- Sodium: 74mg
- Fat: 9g
- Saturated Fat: 4g
- Unsaturated Fat: 5g
- Trans Fat: 0g
- Carbohydrates: 25g
- Fiber: 1g
- Protein: 4g
- Cholesterol: 0mg
Ingredient Breakdown & Smart Substitutions for No Bake Oatmeal Cookies with Peanut Butter
Key Ingredients That Make the Magic Happen
Peanut butter no-bake cookies might seem simple, but each ingredient plays a role in the chewy texture and sweet balance. Here’s a closer look at what’s going into your saucepan and why it matters.
- Granulated Sugar (2 cups / 400 g): This is what sweetens and helps bind the mixture. It also plays a part in the classic glossy texture once boiled. If you’re cutting back, you could try using coconut sugar, but note the flavor will be slightly deeper and the texture slightly softer.
- Plant-Based Butter (½ cup / 115 g): This adds richness and that melt-in-your-mouth feel. It melts smoothly and helps the mixture come together evenly. You can use a spread that holds its shape at room temperature for best results.
- Whole Milk (½ cup / 120 ml): A touch of milk helps melt the sugar and smooth everything out. If needed, you can swap in oat milk or another dairy-free option. Just make sure it’s not too watery or low-fat for texture’s sake.
- 1-Minute Oats (3 cups / 240 g): Quick oats are ideal here. They’re processed smaller than rolled oats, which means they soak up the mixture quickly and hold shape without being too firm. Old-fashioned oats won’t set right and can lead to a crumbly cookie.
- Creamy Peanut Butter (¾ cup / 180 g): Peanut butter is the star. Creamy gives that silky texture, but crunchy works if you like added bite. Choose a spread with minimal ingredients, just peanuts and salt for the cleanest taste.
- Vanilla Extract (1 tbsp / 15 ml): It rounds out the sweetness and balances the flavor. Pure vanilla is best, but even imitation vanilla gets the job done in a pinch.
It’s important to follow the measurements closely here – too much sugar or not enough oats and your cookies won’t set properly.
Make It Your Way (But Stay Delicious)
What’s great about these cookies is how flexible they can be. You can make simple swaps to adjust for pantry limitations, dietary needs, or even just for fun. Let’s walk through a few safe and delicious ways to make these cookies your own.
- Peanut Butter Options: If peanut butter isn’t your thing or you’re baking for someone with an allergy, sunflower seed butter or almond butter are excellent stand-ins. They have a similar consistency and flavor profile that blends well with oats.
- Dairy-Free Swaps: As mentioned above, any plant-based milk that’s thick and unsweetened works well. Oat milk or cashew milk tend to have the best results for richness.
- Reduced Sugar Tips: If you’d like to reduce the sugar, don’t cut it in half—but you can get away with lowering it slightly to about 1¾ cups. Anything less and the structure might suffer.
- Add-Ins: While the classic recipe is all about simplicity, you can stir in extras like unsweetened shredded coconut, toasted seeds, or even a sprinkle of cinnamon for added depth.
Want another creative twist? Check out the No Bake Caramel Pretzel Crack Bars Recipe. It’s the perfect example of how pantry basics can become something irresistible with just a small upgrade.
If you’re prepping with kids or need a fast treat with simple ingredients, peanut butter no-bake cookies remain one of the most reliable options in any baker’s back pocket.
Mastering the Texture – Tips That Actually Work for the Best Peanut Butter No-Bake Cookies
Timing Is Everything
The key to peanut butter no-bake cookies isn’t just the ingredients, it’s the timing. One extra minute or one missed boil can turn dreamy, chewy bites into dry crumbles or sticky blobs. That’s why understanding the cooking process is essential if you want the best texture every single time.
Once your sugar, plant-based butter, and milk mixture begins to bubble in the center, it’s time to start your 60-second timer. This is where the magic happens.
Here’s what you should know:
- Boil the mixture at a rolling boil for exactly one minute—not more, not less
- Boiling too short means the sugar won’t crystallize, and the cookies won’t firm up
- Boiling too long will dry them out and make them crumbly
A digital timer or even your phone stopwatch works perfectly here. The moment the bubbling starts in the middle of the pan, not just on the sides, start counting. Stir gently as you boil to avoid scorching the bottom.
After one minute, remove the pan from heat immediately. Then quickly stir in the oats, peanut butter, and vanilla. Work fast, this mixture starts setting as it cools.
This is where many no-bake recipes go wrong. People either don’t time the boil or guess by sight, which leads to inconsistent results. Getting this step right makes all the difference in texture, chew, and overall success.
Cooling Like a Pro
Once you’ve mixed in the oats and peanut butter, you’ve got a short window to shape your cookies before the mixture becomes too thick to scoop easily. Here’s how to handle the cooling process to get perfect cookies every time.
- Drop quickly: Use a medium cookie scoop or spoon to drop the mixture onto wax paper. Move fast – it firms up as it cools.
- Use parchment or wax paper: These surfaces let the cookies set without sticking.
- Don’t refrigerate immediately: Let them set at room temperature for about 30 minutes before moving them to the fridge if you need to store them quickly.
- Avoid stacking too soon: Wait until they’re fully cool or they’ll stick together.
For the most even results, use a scoop and press down just slightly for shape. These cookies don’t spread, so how you place them is how they’ll set.
If you want to experiment with layered no-bake options, the No Bake Boston Cream Pie Bars are a great example of how proper cooling and layering can elevate a simple treat.
How to Store Peanut Butter No-Bake Cookies & Serve Them Right
Make Now, Enjoy Later
One of the most convenient things about peanut butter no-bake cookies is how well they store. Whether you’re prepping ahead for a party, planning lunchbox treats, or stashing a few for the week, these cookies hold up beautifully.
Here’s how to store them so they stay fresh and chewy:
- Room temperature: Keep cookies in an airtight container at room temperature for up to 1 week. Line the container with parchment or wax paper between layers to prevent sticking.
- Refrigerator storage: Want them firmer or extending their freshness? Pop them into the fridge. They’ll stay good for about 10–12 days.
- Freezer friendly: These cookies freeze well. Place in a single layer on a tray to freeze, then transfer to a zip-top bag or freezer-safe container. Freeze for up to 2 months. When ready to eat, let them thaw at room temperature for 15–20 minutes.
To help you track it easily, here’s a quick storage summary:
| Storage Method | How Long | Tips |
|---|---|---|
| Room Temperature | Up to 7 days | Use airtight container, stack with parchment |
| Refrigerator | 10–12 days | Let sit at room temp before serving |
| Freezer | Up to 2 months | Freeze on tray first, then bag |
Perfect for Parties & Meal Prep
These cookies are also perfect for sharing. Their no-fuss nature means they’re easy to prep in large batches and transport without a mess. Whether you’re assembling dessert trays for events or packing lunchbox snacks for the week, they’re a smart choice.
Here are a few creative ways to serve and gift them:
- Mini stacks in jars with a ribbon for gifts
- Bite-sized versions for kid-friendly lunch treats
- Drizzled with melted chocolate for a dressed-up version
- Cut into bars while warm and soft for a square cookie twist
You could even make them alongside similar treats like the No Bake Lunch Lady Peanut Butter Bars, then offer a “peanut butter bar” tray with multiple textures and toppings.
These little no-bake bites prove that you don’t need a fancy dessert to impress. Just a simple recipe and a little prep go a long way.