If you dream about cracking open a soft cake and watching chocolate flow out like a dessert volcano, these Classic Chocolate Lava Cakes will make it happen. They’re fast, rich, and insanely satisfying in every bite.
The Magic of Classic Chocolate Lava Cakes
Few desserts can top the excitement of chocolate lava cakes. Each spoonful gives a mix of gooey chocolate and tender cake that makes your taste buds cheer. It’s like a little celebration baked in a cup.
Why This Dessert Rules the Table
Nobody can resist warm chocolate melting onto a plate. It’s the ultimate mix of creamy and cakey textures that turn a regular night into something special. The best part? You can make them without needing any fancy tools or tricky techniques.
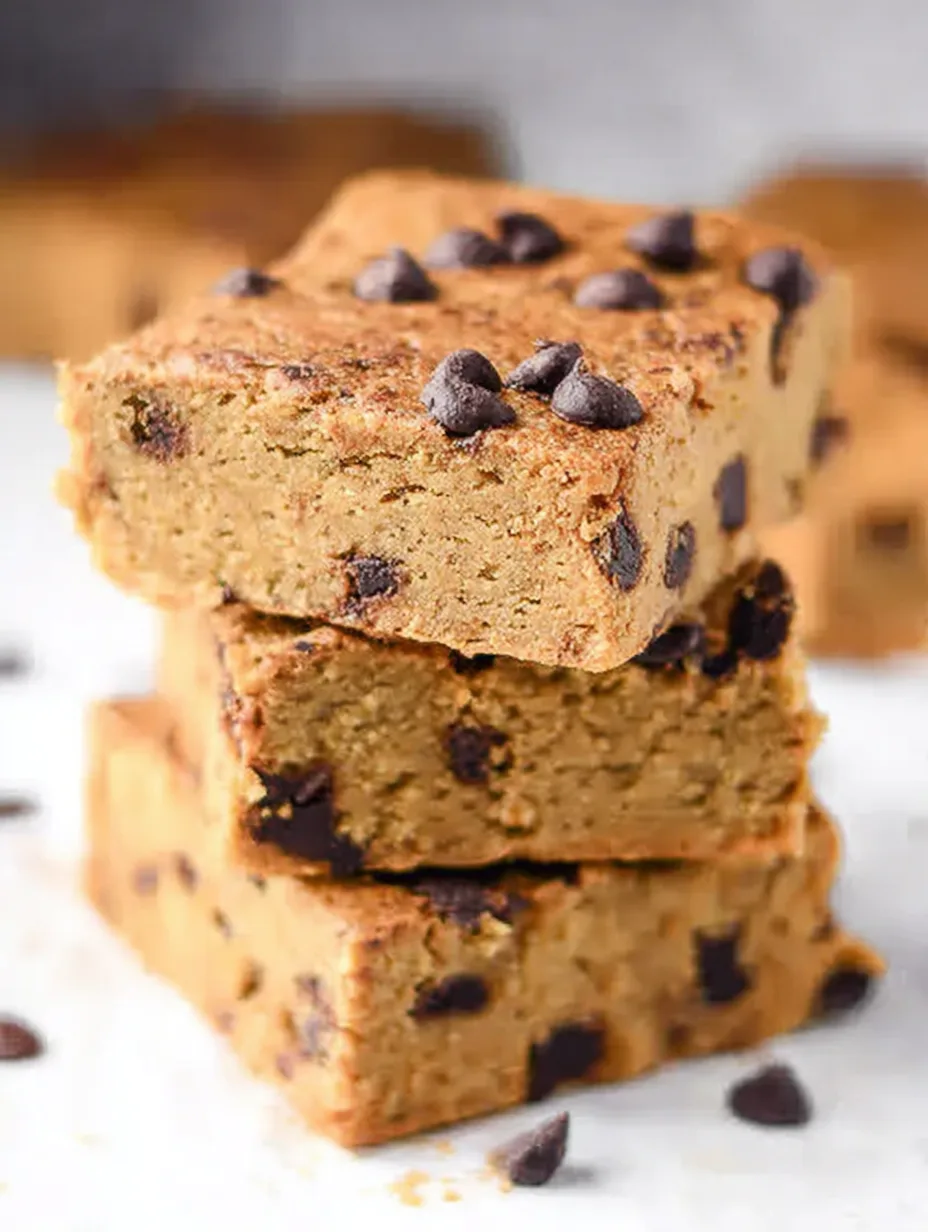
If you’re into easy but impressive chocolate desserts, you might also enjoy the Sweet Potato Protein Brownies. They share that same fudgy charm and are a smart pick for chocolate fans looking for something fun and wholesome.
Here’s why this recipe rocks:
- Takes only about 30 minutes from start to finish
- Uses simple ingredients you probably already have
- Bakes in individual servings that look elegant
- Delivers that melt-in-your-mouth chocolate center every single time
Tips for Getting That Perfect Molten Middle
Timing is everything. Bake too long, and you’ll end up with a regular cake. Bake too short, and it might not hold its shape. The sweet spot is when the sides are set, but the center still jiggles slightly when touched.
Let them rest for two minutes before flipping out of the ramekins. This quick pause helps the outside firm up just enough while keeping the middle irresistibly soft and creamy. The moment you cut into it, the warm chocolate river flows out and steals the show.
Recipe
Print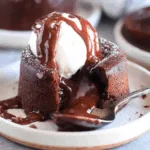
Classic Chocolate Lava Cakes
- Total Time: 33 minutes
- Yield: 6 cakes 1x
Description
Warm, rich, and gooey chocolate cakes with a molten center that melts hearts.
Ingredients
- 2 to 3 tablespoons butter, softened (28–42 g)
- 2 to 3 tablespoons unsweetened cocoa powder
- 1 cup chopped semisweet or bittersweet chocolate (170 g)
- 10 tablespoons salted butter (142 g)
- Pinch of salt (about 1/8 teaspoon)
- 1/2 teaspoon vanilla extract
- 3 large eggs
- 3 large egg yolks
- 1 1/2 cups powdered sugar (171 g)
- 1/2 cup all-purpose flour (71 g)
Instructions
- Preheat oven to 375–400°F (190–200°C).
- Grease six 6–8 oz ramekins with butter, coating every corner.
- Dust with cocoa powder and tap out extra.
- Melt chocolate and butter together until smooth.
- Add salt and vanilla, stir, and let cool slightly.
- Whisk eggs and yolks until light and fluffy.
- Add powdered sugar, mix, then stir in chocolate blend and flour just until combined.
- Divide batter into ramekins on a baking tray.
- Bake 12–13 minutes until sides are set and center soft.
- Cool 2–3 minutes, loosen edges, and invert onto plates.
Notes
- Bake at 375°F if your oven runs hot.
- Use high-quality chocolate chips for the best texture.
- You can make the batter 1–2 days ahead and chill it in ramekins.
- Serve warm with cream, strawberries, or ice cream.
- Prep Time: 20 minutes
- Cook Time: 13 minutes
Nutrition
- Serving Size: undefined
- Calories: undefined
- Sugar: undefined
- Sodium: undefined
- Fat: undefined
- Saturated Fat: undefined
- Unsaturated Fat: undefined
- Trans Fat: undefined
- Carbohydrates: undefined
- Fiber: undefined
- Protein: undefined
- Cholesterol: undefined
Variations and Secrets for Perfect Chocolate Lava Cakes
So, you’ve mastered the gooey center. Now it’s time to have a little fun. Chocolate lava cakes are like the ultimate blank canvas for dessert lovers. You can tweak flavors, fillings, and toppings to make them your own. The best part? Every version still delivers that warm, chocolatey center that makes people smile like they just found treasure.
Delicious Flavor Twists That Keep Things Exciting
Chocolate might be the star, but it’s not the only act. Once you’ve got the base recipe down, experiment with a few simple upgrades that add personality to your cakes.
Try folding in a spoonful of creamy nut butter for a rich surprise inside. Add a hint of instant coffee or espresso powder to deepen the chocolate flavor. Want a lighter twist? Stir in orange zest or a few raspberries for a fruity punch.
And if you’re in the mood for a cool contrast, serve your warm cakes with a scoop of homemade ice cream. For inspiration, check out how the Carnivore Chocolate Mousse Recipe plays with smooth textures and deep cocoa tones, a perfect partner for any molten cake night.
Flavor ideas at a glance:
- Peanut butter or hazelnut spread centers
- Raspberry or cherry filling
- Hint of coffee or caramel swirl
- Dash of orange zest for brightness
Each variation brings its own surprise, making these cakes the most flexible dessert in your kitchen.
How to Nail the Bake Every Time
Here’s the secret: your oven isn’t the same as mine. Even a few degrees difference can change how your lava cake behaves. So, the key is watching, not guessing. When the edges look firm but the center is still shiny and soft, pull them out immediately.
You can even test one cake early to find your perfect timing. A clean edge with a molten core is what you want. It’s better to underbake slightly and let the heat inside finish the job than to end up with a solid brownie.
If you prep ahead, remember this: cold batter needs an extra 30 to 60 seconds in the oven. That’s it. Bake, rest, flip, and get ready for the magic moment when chocolate spills onto the plate.
Baking Chart for Quick Reference
| Oven Temp (°F) | Bake Time (minutes) | Result |
|---|---|---|
| 375 | 13–14 | Soft edges, gooey center |
| 400 | 11–12 | Thicker crust, runnier middle |
| 425 | 10–11 | Firmer crust, thinner lava |
Pro Tips for a Showstopping Finish
Want that restaurant-style presentation? Dust with powdered sugar and top with a scoop of vanilla ice cream or a drizzle of rich chocolate syrup. Fresh berries and mint leaves make it pop visually and add a refreshing balance to the deep chocolate flavor.
For a touch of class, serve the cakes warm in their ramekins instead of flipping them out. That gooey center still shines, but the presentation feels elegant and cozy.
Serving, Styling, and Storing Chocolate Lava Cakes
Now that you’ve baked up those rich little masterpieces, it’s time for the best part — serving them. Presentation can turn a simple dessert into something unforgettable. Plus, you’ll want to keep leftovers just as delicious as when they came out of the oven.
Creative Ways to Serve Your Lava Cakes
Chocolate lava cakes are showstoppers on their own, but why stop there? A little extra effort takes them from “yum” to “wow.” Pair them with something cold, creamy, or colorful for that restaurant-level finish.
Here are some fun ways to plate and serve:
- Place the cake in the center of a white plate and drizzle chocolate syrup in a swirl around it.
- Add a scoop of vanilla or strawberry ice cream on top for a hot-and-cold experience that guests will talk about all night.
- Dust lightly with powdered sugar and add a few fresh berries for color and freshness.
- Feeling fancy? A drizzle of caramel or a spoonful of berry compote makes it picture-perfect.
If you want another no-fail dessert idea that’s just as visually stunning, the No-Bake Boston Cream Pie Bars are a total crowd-pleaser. Both desserts bring drama to the table but require minimal effort.
Storage Secrets That Actually Work
You might think lava cakes need to be eaten immediately, but you can store them smartly and still enjoy that molten goodness later.
If you’ve baked extras, let them cool completely, then store them in airtight containers in the fridge for up to three days. To reheat, pop one in the microwave for about 15 seconds or warm it in a preheated oven at 350°F for 5 minutes. The center won’t be as molten as fresh, but the flavor will stay incredible.
You can also refrigerate unbaked batter in ramekins for up to two days. Just cover tightly with plastic wrap and bake when ready. Add an extra 30 to 60 seconds to your bake time if starting from cold.
Here’s a quick cheat sheet for your fridge game:
| Stage | Storage Method | Shelf Life | Reheat Time |
|---|---|---|---|
| Baked Cakes | Airtight container, fridge | 3 days | 15 sec microwave or 5 min oven |
| Unbaked Batter | Covered ramekins, fridge | 2 days | Add 30–60 sec to bake time |
| Frozen Batter | Freezer-safe ramekins | 1 month | Thaw overnight, bake normally |
When to Serve Them for Maximum Impact
Chocolate lava cakes shine when served fresh from the oven. They make the perfect ending to a romantic dinner, a family celebration, or a cozy weekend treat. Their small size and quick bake time mean you can whip them up even for last-minute guests without breaking a sweat.
Serve them right after dinner while everyone’s still chatting and laughing. The warm chocolate aroma filling the room will make everyone forget the main course. And if you pair them with coffee or a scoop of ice cream, congratulations, you’ve officially become the dessert hero of the night.
Expert Tips and Troubleshooting Chocolate Lava Cakes
Even if you’ve nailed your first batch, there’s always a way to make your lava cakes even better. Small tweaks can make the difference between “pretty good” and “wow, that’s incredible.” These expert tips keep every cake picture-perfect, gooey, and irresistible.
Baking Tips Straight from the Pros
Professional pastry chefs know that chocolate desserts are all about balance — texture, timing, and temperature. Luckily, you don’t need a culinary degree to make your lava cakes look and taste pro-level.
Try these smart moves next time:
- Use quality chocolate. The flavor depends on it. Skip cheap chocolate chips that won’t melt smoothly. Go for a brand like Ghirardelli or Guittard for that silky finish.
- Don’t overmix the batter. Once your flour disappears, stop stirring. Overmixing ruins the airy structure that gives your cake its soft edge and molten center.
- Mind your timing. Every oven has its quirks. Test one cake early to find your sweet spot. You can always add time, but you can’t take it back.
- Serve immediately. The lava effect fades as the cakes cool, so get them from oven to plate fast.
If you’re craving another chocolate fix that’s fun to make and full of nostalgic crunch, the Chocolate Covered Rice Krispie Treats Recipe is a perfect companion. It’s playful, quick, and makes a great pairing with your lava cakes for dessert platters or parties.
Common Problems (And How to Fix Them)
Even the best bakers face a few cake hiccups. Luckily, every problem has a simple fix.
| Problem | Why It Happens | The Fix |
|---|---|---|
| Cake didn’t rise | Batter too cold or overmixed | Let batter rest 10 minutes before baking |
| Center too firm | Baked too long or oven too hot | Lower temperature by 25°F next time |
| Cake collapsed | Pulled out too soon | Bake 1–2 minutes longer until sides are set |
| Stuck in ramekin | Not greased properly | Brush butter evenly and dust with cocoa before adding batter |
A few practice runs and you’ll have the confidence of a pastry chef. Remember, perfection in this dessert comes from knowing your oven and trusting your timing.
Pro Secret: Make It Your Signature Dessert
You can easily turn lava cakes into your go-to special dessert. Serve them on holidays, birthdays, or casual weekends, they never fail to impress. Add a swirl of caramel or a sprinkle of sea salt on top for your own signature twist.
If you love collecting easy dessert recipes that deliver big results, check out the Sweet Potato Protein Brownies again for a healthier twist that still satisfies every sweet craving.
Final Thoughts
Classic Chocolate Lava Cakes are proof that the simplest ingredients can create pure magic. In just half an hour, you get a warm, rich, melt-in-your-mouth dessert that’s perfect for any occasion. With a few tweaks, smart storage, and your new baking know-how, you’re set to make this recipe your personal favorite.
So grab those ramekins, preheat your oven, and let the chocolate flow. Your table and your taste buds will thank you.