Craving takeout but tired of waiting for delivery? This homemade sticky chicken recipe transforms basic ingredients into restaurant-quality magic.
With crispy chicken coated in a sweet-and-savory glaze, you’ll achieve perfect texture and flavor without leaving your kitchen. Let’s create this crowd-pleasing dish that beats any delivery option!
Why You’ll Love This Better-Than-Takeout Chicken
Three special qualities make this sweet and crispy chicken recipe stand out. First, the triple-coating method creates irresistible crunch.
Second, the homemade sauce delivers balanced sweet and tangy notes. Finally, this dish comes together faster than waiting for delivery drivers!
Texture That Delights
Cornstarch and flour work together to create an ultra-crispy exterior that stays crunchy even after saucing. The chicken pieces become golden and textured through the quick frying process.
Sauce That Clings Perfectly
Our reduced glaze features the ideal balance of sweet and savory elements. Unlike watery takeout sauces, this version coats each chicken piece beautifully. For those wanting milder flavors, simply adjust the chili sauce to your preference.
Faster Than Delivery
From start to finish, you’ll spend just 30 minutes creating this delicious main dish. That’s often less time than restaurant delivery takes! Plus, you control all ingredients for a fresher, healthier result.
Recipe
Print
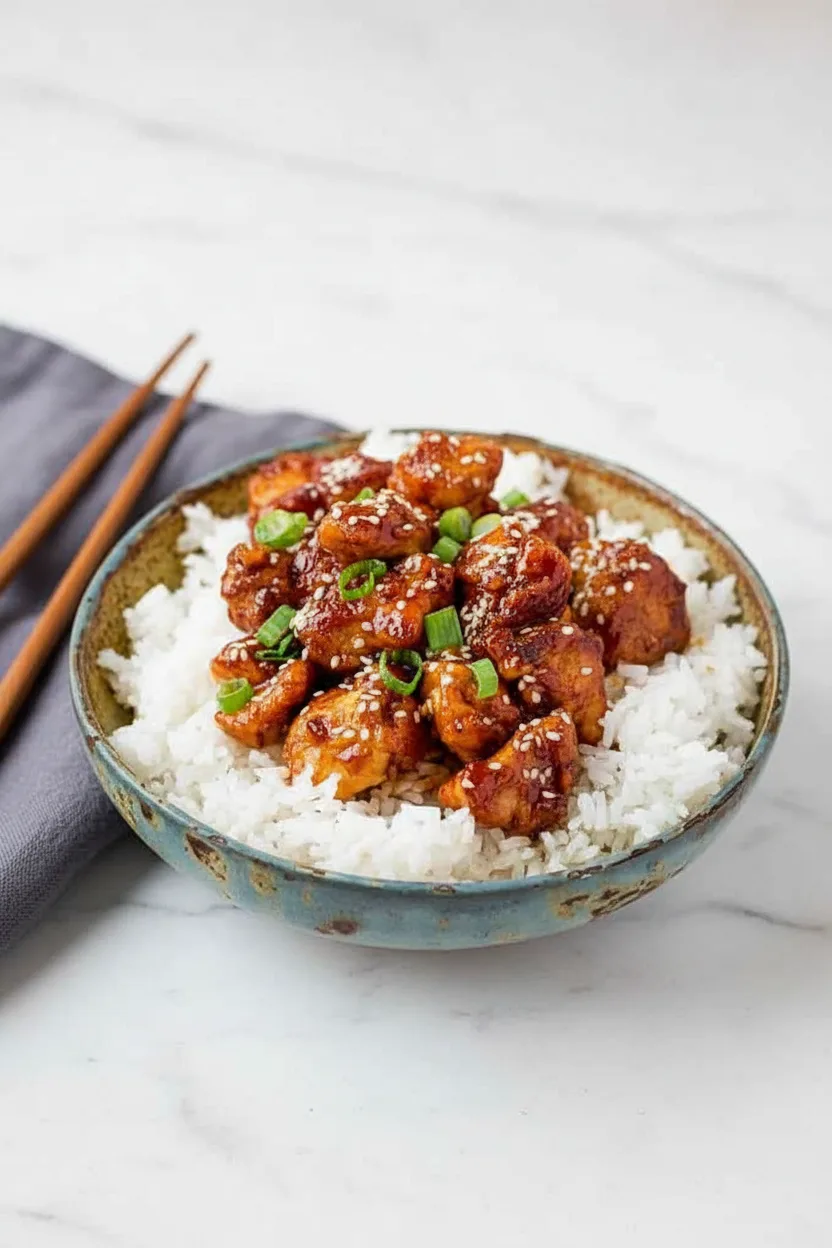
Better-Than-Takeout Sticky Chicken – Sweet & Crispy
- Total Time: 30 min
- Yield: 4 servings 1x
Description
Crispy chicken coated in sweet and sticky sauce – faster and tastier than takeout!
Ingredients
- 5 tbsp vegetable oil (74 ml)
- 2 eggs (lightly beaten)
- 3 tbsp cornstarch (27 g)
- 10 tbsp all-purpose flour (75 g)
- ½ tsp salt (3 g)
- ½ tsp pepper (1 g)
- ½ tsp garlic salt (3 g)
- 2 tsp paprika (4 g)
- 3 chicken breast fillets (400 g)
- 1 tbsp sesame oil (15 ml)
- 2 cloves garlic (minced)
- 1 tbsp rice vinegar (15 ml)
- 2 tbsp honey (30 ml)
- 2 tbsp sweet chili sauce (30 ml)
- 3 tbsp ketchup (45 g)
- 2 tbsp brown sugar (24 g)
- 4 tbsp soy sauce (60 ml)
- boiled rice
- 2 tbsp sesame seeds (18 g)
- 1 small bunch scallions (chopped)
Instructions
- Heat the oil in a wok or large frying pan until very hot.
- Place egg in one shallow bowl and cornstarch in another.
- Combine flour, salt, pepper, garlic salt and paprika in third bowl.
- Dredge chicken in cornstarch, dip in egg, then coat in seasoned flour.
- Cook chicken in hot oil 6-7 minutes until browned. Work in batches if needed.
- Remove chicken and drain on paper towels.
- Combine sauce ingredients in hot wok. Cook 2-3 minutes until reduced.
- Return chicken to wok and toss to coat in sauce.
- Cook 1-2 minutes until sauce clings to chicken.
- Serve over rice with sesame seeds and scallions.
Notes
- Use cooking thermometer to maintain 350-375°F oil temperature
- For less spice, reduce sweet chili sauce amount
- Triple coating ensures maximum crispiness
- Refrigerate leftovers up to 4 days
- Prep Time: 15 min
- Cook Time: 15 min
- Category: Main Course
- Method: Baked
- Cuisine: American
Nutrition
- Calories: 542 kcal
- Sugar: 22 g
- Sodium: 1915 mg
- Fat: 28 g
- Carbohydrates: 47 g
- Fiber: 2 g
- Protein: 26 g
Ingredients and Substitutions
Base Components
These pantry staples form the foundation of our crispy chicken coating:
- All-purpose flour – Creates perfect crunch
- Cornstarch – Adds lightness to the batter
- Eggs – Helps coating adhere to chicken
- Vegetable oil – Ensures even cooking
- Sesame seeds – Delivers nutty finishing notes
Flavor Powerhouses
These ingredients create our signature sticky sauce:
- Honey – For natural sweetness
- Rice vinegar – Adds pleasant tang
- Soy sauce – Provides savory depth
- Garlic – Brings aromatic punch
- Brown sugar – Creates caramelization
Need substitutions? Try these simple swaps:
- Gluten-free flour blend (1:1 ratio)
- Maple syrup for honey
- Tamari instead of soy sauce
- Red pepper flakes to replace chili sauce
How to Make Crispy Sticky Chicken
Step 1: Prepare Your Dredging Stations
Set up three shallow bowls with your coatings. Place cornstarch in the first bowl, beaten eggs in the second, and seasoned flour mixture in the third. This assembly line setup makes the coating process efficient.
Step 2: Triple-Coat Chicken Pieces
First, roll chicken in cornstarch for initial crispness. Next, dip completely in egg wash. Finally, coat thoroughly in seasoned flour mixture. Shake off excess between each step for even coverage.
Step 3: Fry to Golden Perfection
Heat oil in your wok until shimmering hot. Fry chicken in batches for 6-7 minutes, turning occasionally until deeply golden. Don’t overcrowd the pan – proper spacing ensures maximum crispness.
Step 4: Create the Signature Sauce
Combine all sauce ingredients in the hot wok. Cook on high 2-3 minutes until thickened to a glaze-like consistency – the sauce should generously coat the back of your spoon.
Step 5: Combine and Serve
Return crispy chicken to the wok and toss vigorously to coat every piece. The sauce should cling perfectly to the textured batter. Serve immediately for peak deliciousness.
Pro Tips for Success
Achieve restaurant-quality results every time with these expert techniques:
Maintain Proper Oil Temperature
Use a cooking thermometer to ensure oil stays between 350-375°F. If the oil smokes, it’s too hot. If chicken absorbs oil instead of sizzling, it needs more heat.
Pat Chicken Dry First
Before coating, blot chicken thoroughly with paper towels. Dry surfaces help every layer stick better and prevent oil splattering during frying.
Boost Flavor Coverage
Add half the sesame seeds during the final toss, then sprinkle the remaining seeds over the plated dish. This double-layer method maximizes nutty flavor in every bite.
Master the Sauce Consistency
The sauce should reduce enough to coat chicken without becoming overly thick or syrupy. Remember: it will continue thickening slightly when you add the hot chicken pieces.
Flavor Variations
Personalize this versatile recipe with simple twists:
Tangy Orange Version
Replace sugar with orange zest and ¼ cup fresh orange juice. For extra fruity notes, mix in 1 teaspoon orange extract before reducing the sauce.
Spicy Sichuan Style
Add 1 teaspoon Sichuan peppercorns with your sauce ingredients. Finish with chili oil drizzle for authentic heat that tingles the tongue without overpowering.
Kickin’ Pineapple Twist
Introduce tropical sweetness with ½ cup small pineapple chunks. Cook them briefly when preparing the sauce. The natural sugars caramelize beautifully under high heat.
Serving Suggestions
While this dish shines over simple boiled rice, consider these presentation upgrades:
- Serve over jasmine rice for enhanced floral aroma
- Pair with stir-fried seasonal vegetables
- Offer with steamed edamame appetizers
- Accompany with refreshing cucumber salad
- Find more inspiration in our list of spring meal suggestions for family dinners
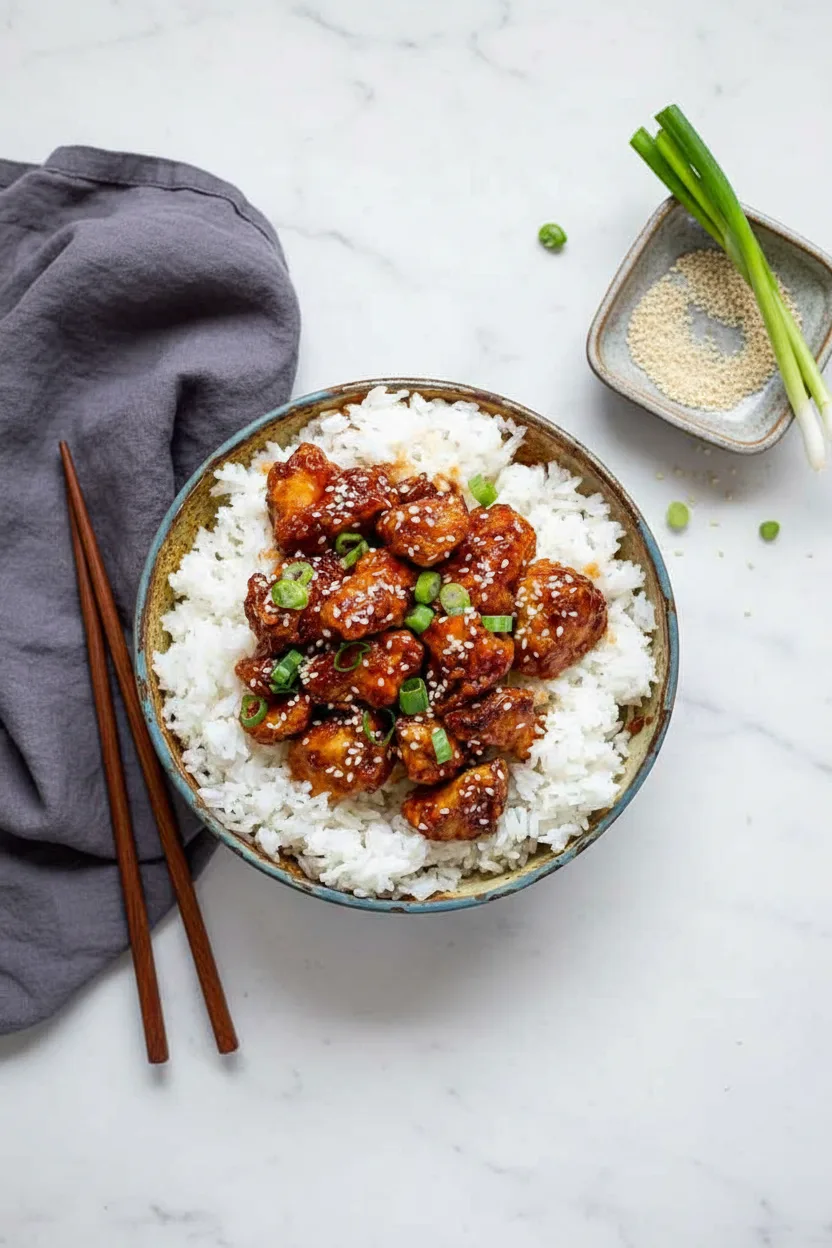
Plating Techniques
For restaurant-worthy presentation, mound rice in the center of shallow bowls. Arrange chicken pieces artfully around the rice. Top with sesame seeds and scallions, then drizzle leftover sauce decoratively.
Storage and Freezing Instructions
Refrigerator Storage
Store leftovers in airtight container for up to 4 days. Reheat gently in oven at 325°F for 15 minutes or until warmed through – microwaving may soften the crispy coating.
Freezing Techniques
Freeze un-sauced chicken pieces on parchment-lined baking sheets before transferring to freezer bags. To serve, reheat frozen chicken in 375°F oven for 25 minutes before tossing with freshly prepared sauce.
Nutrition Facts per Serving
| Calories | Fat | Carbs | Protein | Fiber | Sugar | Sodium |
|---|---|---|---|---|---|---|
| 542 | 28g | 47g | 26g | 2g | 22g | 1915mg |
FAQs About Crispy Sticky Chicken
Can I bake instead of fry?
While deep frying creates unparalleled crunch, baking works in a pinch. Coat chicken pieces as directed, spray with oil, and bake at 425°F for 18-20 minutes flipping halfway.
How do I reduce the sodium content?
Use low-sodium soy sauce and eliminate garlic salt from the coating mixture. Replace garlic salt with a teaspoon of garlic powder combined with a pinch of salt.
What’s the best side dish?
Steamed broccoli or bok choy make excellent vegetable pairings. For dessert, complement the meal with our zesty lemon blueberry cheesecake that balances savory flavors beautifully.
Can I use different proteins?
This method works wonderfully with firm tofu, shrimp, or pork alternatives. Adjust cooking times accordingly—seafood cooks faster than chicken, for example.
Any tips for extra crispiness?
For ultimate crunch, let coated chicken rest 10 minutes before frying. The flour absorbs moisture better, creating a firmer coating that fries up crisper.
How soon should I serve this dish?
Serve within 5 minutes after saucing for maximum texture contrast. The crispy coating gradually softens as it sits in sauce.
Final Thoughts
When homemade tastes better than takeout, you know you’ve found a recipe worth keeping. This sticky chicken delivers that magical combination of crispiness and sauciness we crave in Asian-inspired dishes.
From its straightforward ingredients to versatile serving options, this main dish provides weeknight solution and weekend special occasion potential in equal measure.
Next time you want comforting takeout flavors, choose this homemade version instead your tastebuds will thank you! If you enjoy baked goods with your meals, consider pairing this chicken with our simple bakery-style pistachio muffins for a complete dining experience.