Welcome to a timeless baking tradition that heralds the arrival of spring—the Classic Strawberry Rhubarb Lattice Pie. This dessert masterfully balances the sweet burst of ripe strawberries with the delightful tartness of fresh rhubarb, all encased in a buttery, flaky homemade crust. Achieving the perfect lattice top is easier than you think and creates a stunning centerpiece for any table.
In this comprehensive guide, we’ll walk you through every step to ensure your pie is a beautiful, delicious success, from selecting the best fruit to achieving that golden-brown, crisp crust.
Why This Pie is a Springtime Essential
The combination of strawberry and rhubarb is a culinary rite of passage. Strawberries bring natural sweetness and vibrant color, while rhubarb provides a tangy, almost citrus-like backbone that keeps the filling from being cloying. When baked together, their flavors meld into a complex, jammy filling that’s simply irresistible. A homemade pie crust, unlike a store-bought version, offers a superior flavor and texture—rich, tender, and sturdy enough to hold the juicy filling.
This recipe is designed for bakers of all levels, providing clear instructions and tips for a foolproof result. If you love fruity desserts, you’ll also adore our Lemon Blueberry Cheesecake for another vibrant treat.
Ingredients and Substitutions
Using quality ingredients is key to an exceptional pie. Here’s a closer look at what you’ll need and possible swaps.
The Perfect Fruit Filling
- Rhubarb (1 ¼ pounds): Look for firm, crisp stalks with vibrant red or pink color. If fresh isn’t available, frozen rhubarb works well; use it directly from frozen to prevent excess mushiness.
- Strawberries (1 pound): Use ripe, in-season strawberries for the best flavor. Hull and slice them uniformly for even cooking.
- Sugars (⅔ cup white, ⅓ cup brown): The combination creates depth. The brown sugar adds a hint of molasses warmth.
- Tapioca Starch (3 tbsp): This is our thickener of choice as it creates a clear, glossy filling without cloudiness. Cornstarch can be used in a pinch.
- Flavor Enhancers: Orange zest, a splash of orange juice, and pure vanilla extract brighten the filling beautifully.
The Homemade Pie Crust
A double crust is non-negotiable for a proper lattice pie. Using a trusted recipe for a buttery, flaky crust makes all the difference. The fat (like high-quality butter) should be very cold to ensure flakiness.
Step-by-Step Baking Instructions
Follow these detailed steps for pie perfection.
Preparing the Crust and Filling
Start by rolling out your bottom crust to a 12-13 inch circle. Gently fit it into your 9-inch pie pan, trim the overhang, and chill it in the refrigerator. This prevents shrinkage during baking. In a large bowl, combine the sliced strawberries, rhubarb, sugars, orange zest, orange juice, vanilla, and salt.
Gently toss, then add the tapioca starch. Let this mixture macerate for 20 minutes; this draws out juices and allows the thickener to begin working.
Assembling the Lattice Top
Roll out the top crust to the same size. Using a pizza cutter or sharp knife, cut it into about 1-inch wide strips. Remove the chilled pie shell from the fridge. Give the filling a final stir and pour it into the shell, avoiding the excess liquid at the bottom of the bowl. Dot the top with small pieces of cold butter.
Now, create the lattice: lay 5-6 strips vertically across the pie. Fold back every other strip and lay a horizontal strip across. Unfold the vertical strips, then fold back the alternate ones to lay another horizontal strip. Repeat until the top is covered. Trim and crimp the edges to seal.
Baking to Golden Perfection
Preheat your oven to 425°F (220°C) with a rack in the lower third. Place a foil-lined baking sheet in the oven to preheat—this catches any drips and helps cook the bottom crust. Brush the lattice with an egg wash (1 egg beaten with 1 tbsp milk) and sprinkle with coarse sugar for a sparkling, crisp finish. Bake on the preheated sheet for 15 minutes, then reduce the heat to 375°F (190°C).
Bake for another 40-50 minutes until the crust is deeply golden and the filling is bubbling vigorously. Let the pie cool completely, for at least 3 hours, to allow the filling to set properly. This patience prevents a runny slice!
Pro Tips for Pie Success
- Keep Everything Cold: Cold ingredients are the secret to a flaky crust. If your dough gets warm while working, pop it back in the fridge for 10 minutes.
- Don’t Skip the Maceration: Letting the fruit sit with sugar and thickener is crucial for a set filling that isn’t watery.
- Use a Pie Shield: If the edges of your crust brown too quickly, use a pie shield or strips of foil to protect them during the longer bake.
- Cool Completely: Resisting the urge to slice into a warm pie is the hardest but most important step for clean slices.
Nutrition and Serving Suggestions
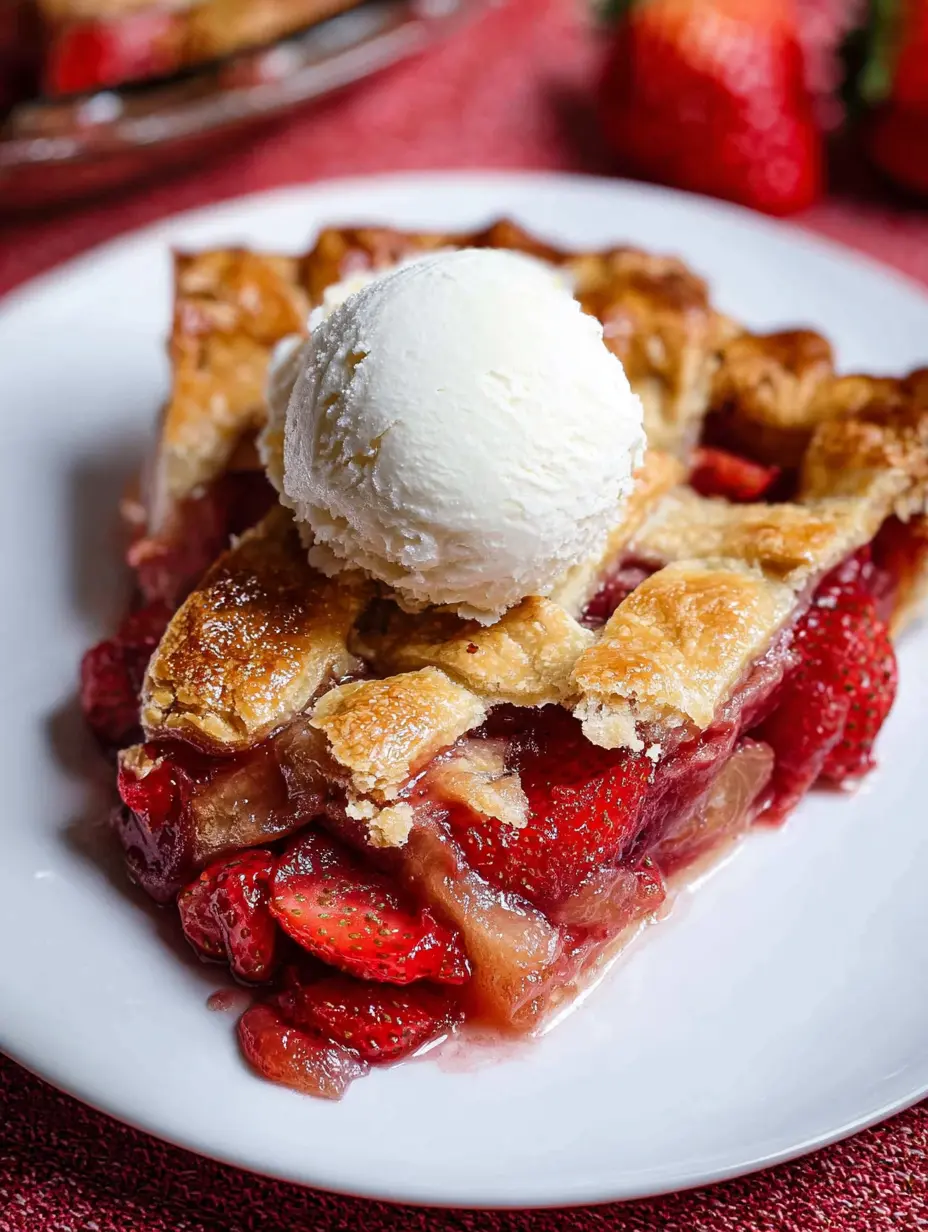
This pie is a celebration dessert, best enjoyed in moderation. A single serving provides a satisfying balance of carbohydrates from the fruit and crust, along with a good amount of dietary fiber. It pairs wonderfully with a lighter accompaniment to cut the richness. A scoop of vanilla bean ice cream or a dollop of freshly whipped cream is classic.
For a contrasting savory side that’s perfect for a larger meal, try our refreshing Lemon Herb Pasta Salad with Marinated Chickpeas.
| Nutrition Facts | Per Serving (1 slice) |
|---|---|
| Calories | 376 kcal |
| Total Fat | 16 g |
| Carbohydrates | 57 g |
| Fiber | 4 g |
| Sugar | 29 g |
| Protein | 4 g |
| Sodium | 286 mg |
Storage and Make-Ahead Options
Store leftover pie, covered, at room temperature for up to two days or in the refrigerator for up to four days. The unbaked pie dough can be made and refrigerated up to 2 days in advance, or frozen for up to 3 months. The filling can also be prepared and refrigerated a day ahead.
For another fantastic make-ahead dessert that’s always a crowd-pleaser, explore our recipe for Lemon Cheesecake Bars with Buttery Biscuit Base.
Conclusion
Baking a Classic Strawberry Rhubarb Lattice Pie is a rewarding endeavor that fills your home with an incredible aroma and delivers a dessert that’s as beautiful as it is delicious. By following this guide, you’ll master the techniques for a flaky crust, a perfectly set sweet-tart filling, and an impressive lattice weave.
Remember, the best pies are made with patience and care. So gather your ingredients, preheat your oven, and get ready to bake a pie that will become a cherished part of your family’s traditions. Happy baking!
The Recipe
Print
Classic Strawberry Rhubarb Lattice Pie
- Total Time: 1 hr 25 min
- Yield: 8 servings 1x
Description
A stunning homemade pie featuring a sweet strawberry and tart rhubarb filling encased in a buttery, flaky crust with a beautiful woven lattice top.
Ingredients
1 Double pie crust
1 ¼ pounds rhubarb
1 pound strawberries
⅔ cup white granulated sugar
⅓ cup brown sugar
3 tablespoons tapioca starch
¼ teaspoon salt
1 teaspoon orange zest
2 teaspoons orange juice
1 teaspoon vanilla extract
3 tablespoons butter
1 large egg
1 tablespoon milk
Sugar for topping
Instructions
- If using homemade pie dough, start by rolling out your dough. Leave one dough in the fridge while rolling out the base into a 12-13-inch circle for a 9” pie pan. Lay the dough into the pie pan and gently push it into the base and sides, trimming off the overhang longer than an inch. Place the pie into the refrigerator to chill until ready.
- Place the sliced strawberries and rhubarb into a large, non-reactive bowl. Add 1/3 cup white granulated sugar (reserving another 1/3 cup), 1/3 cup brown sugar, 2 teaspoons orange juice, 1 teaspoon orange zest, 1 teaspoon vanilla extract, and ¼ teaspoon salt. Gently mix until fully combined, then add 3 tablespoons of tapioca starch, mix again, and let sit for about 20 minutes.
- Move the oven rack to the bottom third level and preheat to 425°F / 220°C. Line a baking sheet with foil and place into oven while it heats.
- While heating, roll out the other pie dough to the same size. If using a lattice top, cut the pie dough into roughly 1-inch strips (a pizza cutter works well here). Remove the pie dish from the refrigerator, mix the rest of the sugar into the pie filling, and then fill the pie dish. Scoop the filling out of the bowl without getting too much of the juice at the bottom. Cut the 3 tablespoons of butter into chunks and dot the top of the filling with the pieces.
- Place about 5 strips of pie dough across the top of the pie, about a ½ inch or so apart and parallel to each other. Gently pull back strips 1, 3, and 5 and place a new strip perpendicular to and on top of strips 2 and 4. Lay strips 1, 3, and 5 back down and then pull back strips 2 and 4. Lay another strip on top of them and perpendicular, then lay strips 2 and 4 back down. Repeat this process until you make it across the pie. Tuck the overhanging pieces under the bottom pie crust and pinch to seal.
- In a small bowl, mix the egg with about a tablespoon of milk. With a pastry brush, brush the top of the pie dough with the egg and milk mixture. Optionally, add some sugar to the top of the pie dough, like demerara or turbinado.
- Place the pie dish onto the baking sheet in the oven. Bake for 15 minutes and then lower the temperature to 375°F / 190°C. Continue baking for another 40-50 minutes. The pie is done when the crust is browned, and the fruit filling starts to boil over the crust.
- Allow the pie to fully cool and set, at least 2-3 hours. The longer it sits out to set, the less runny it should be when you slice into it. Serve warm or at room temperature.
Notes
- Let the fruit filling macerate for the full 20 minutes to draw out juices and activate the thickener.
- Pre-chilling the bottom crust and using a preheated baking sheet helps prevent a soggy bottom.
- Allowing the pie to cool completely is critical for the filling to set properly and slice cleanly.
- Prep Time: 30 min
- Cook Time: 55 min
- Category: Main Course
- Method: Baked
- Cuisine: American
Nutrition
- Calories: 376 kcal
- Sugar: 29 g
- Sodium: 286 mg
- Fat: 16 g
- Carbohydrates: 57 g
- Fiber: 4 g
- Protein: 4 g